WiseMindAI Obsidian Plugin
The WiseMindAI Obsidian plugin brings WiseMindAI’s AI assistant into Obsidian. You can summarize notes, generate knowledge cards, and ask questions about your notes directly in Obsidian, and sync Markdown between Obsidian and WiseMindAI.
It’s for people who write and organize notes in Obsidian and also want WiseMindAI for summarizing, learning, review, and knowledge management. The plugin doesn’t replace Obsidian—it lets content in Obsidian keep working with WiseMindAI.

Before you start
Complete these two steps first:
- Install and launch the WiseMindAI desktop app.
- In WiseMindAI, turn on the local API (default
http://127.0.0.1:38221).
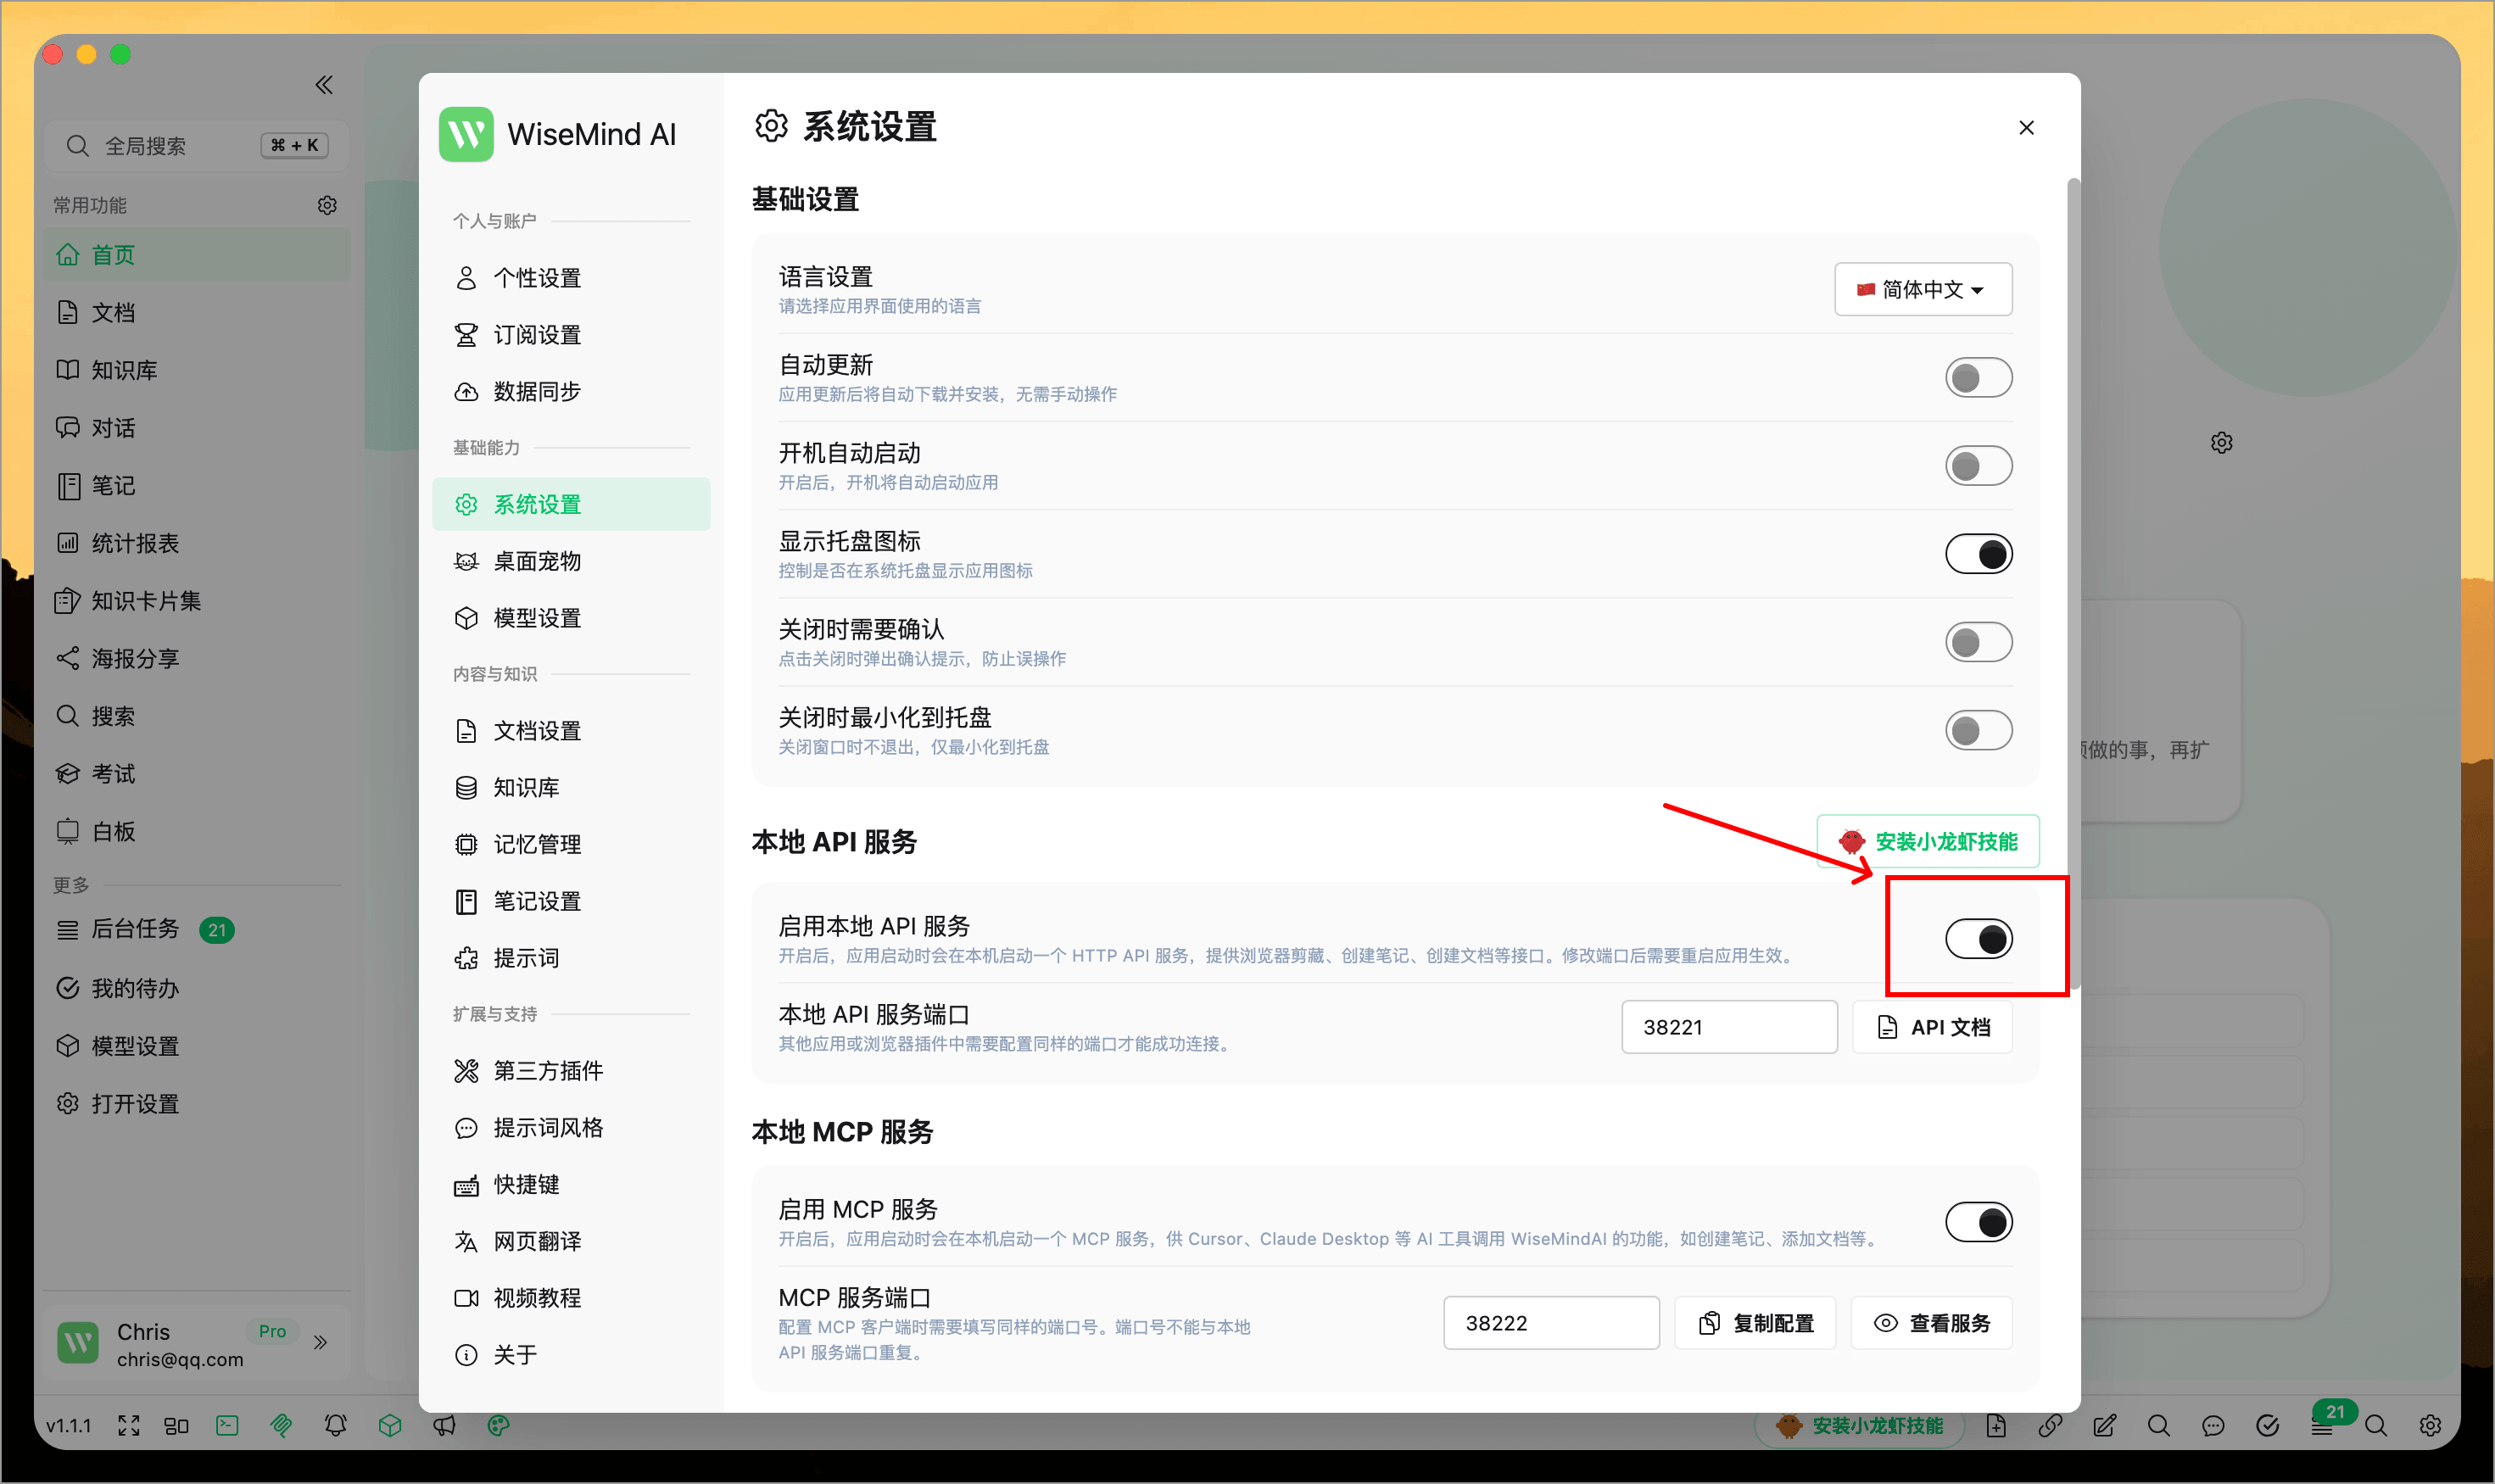
If you changed the local API port, set the same value in the WiseMindAI plugin settings in Obsidian.
Plugin installation
Option 1: Obsidian Community Plugins (recommended)
In Obsidian, open Settings → Community plugins, search for WiseMindAI, and install. You can also click the button below to open the plugin page.
Open Obsidian plugin page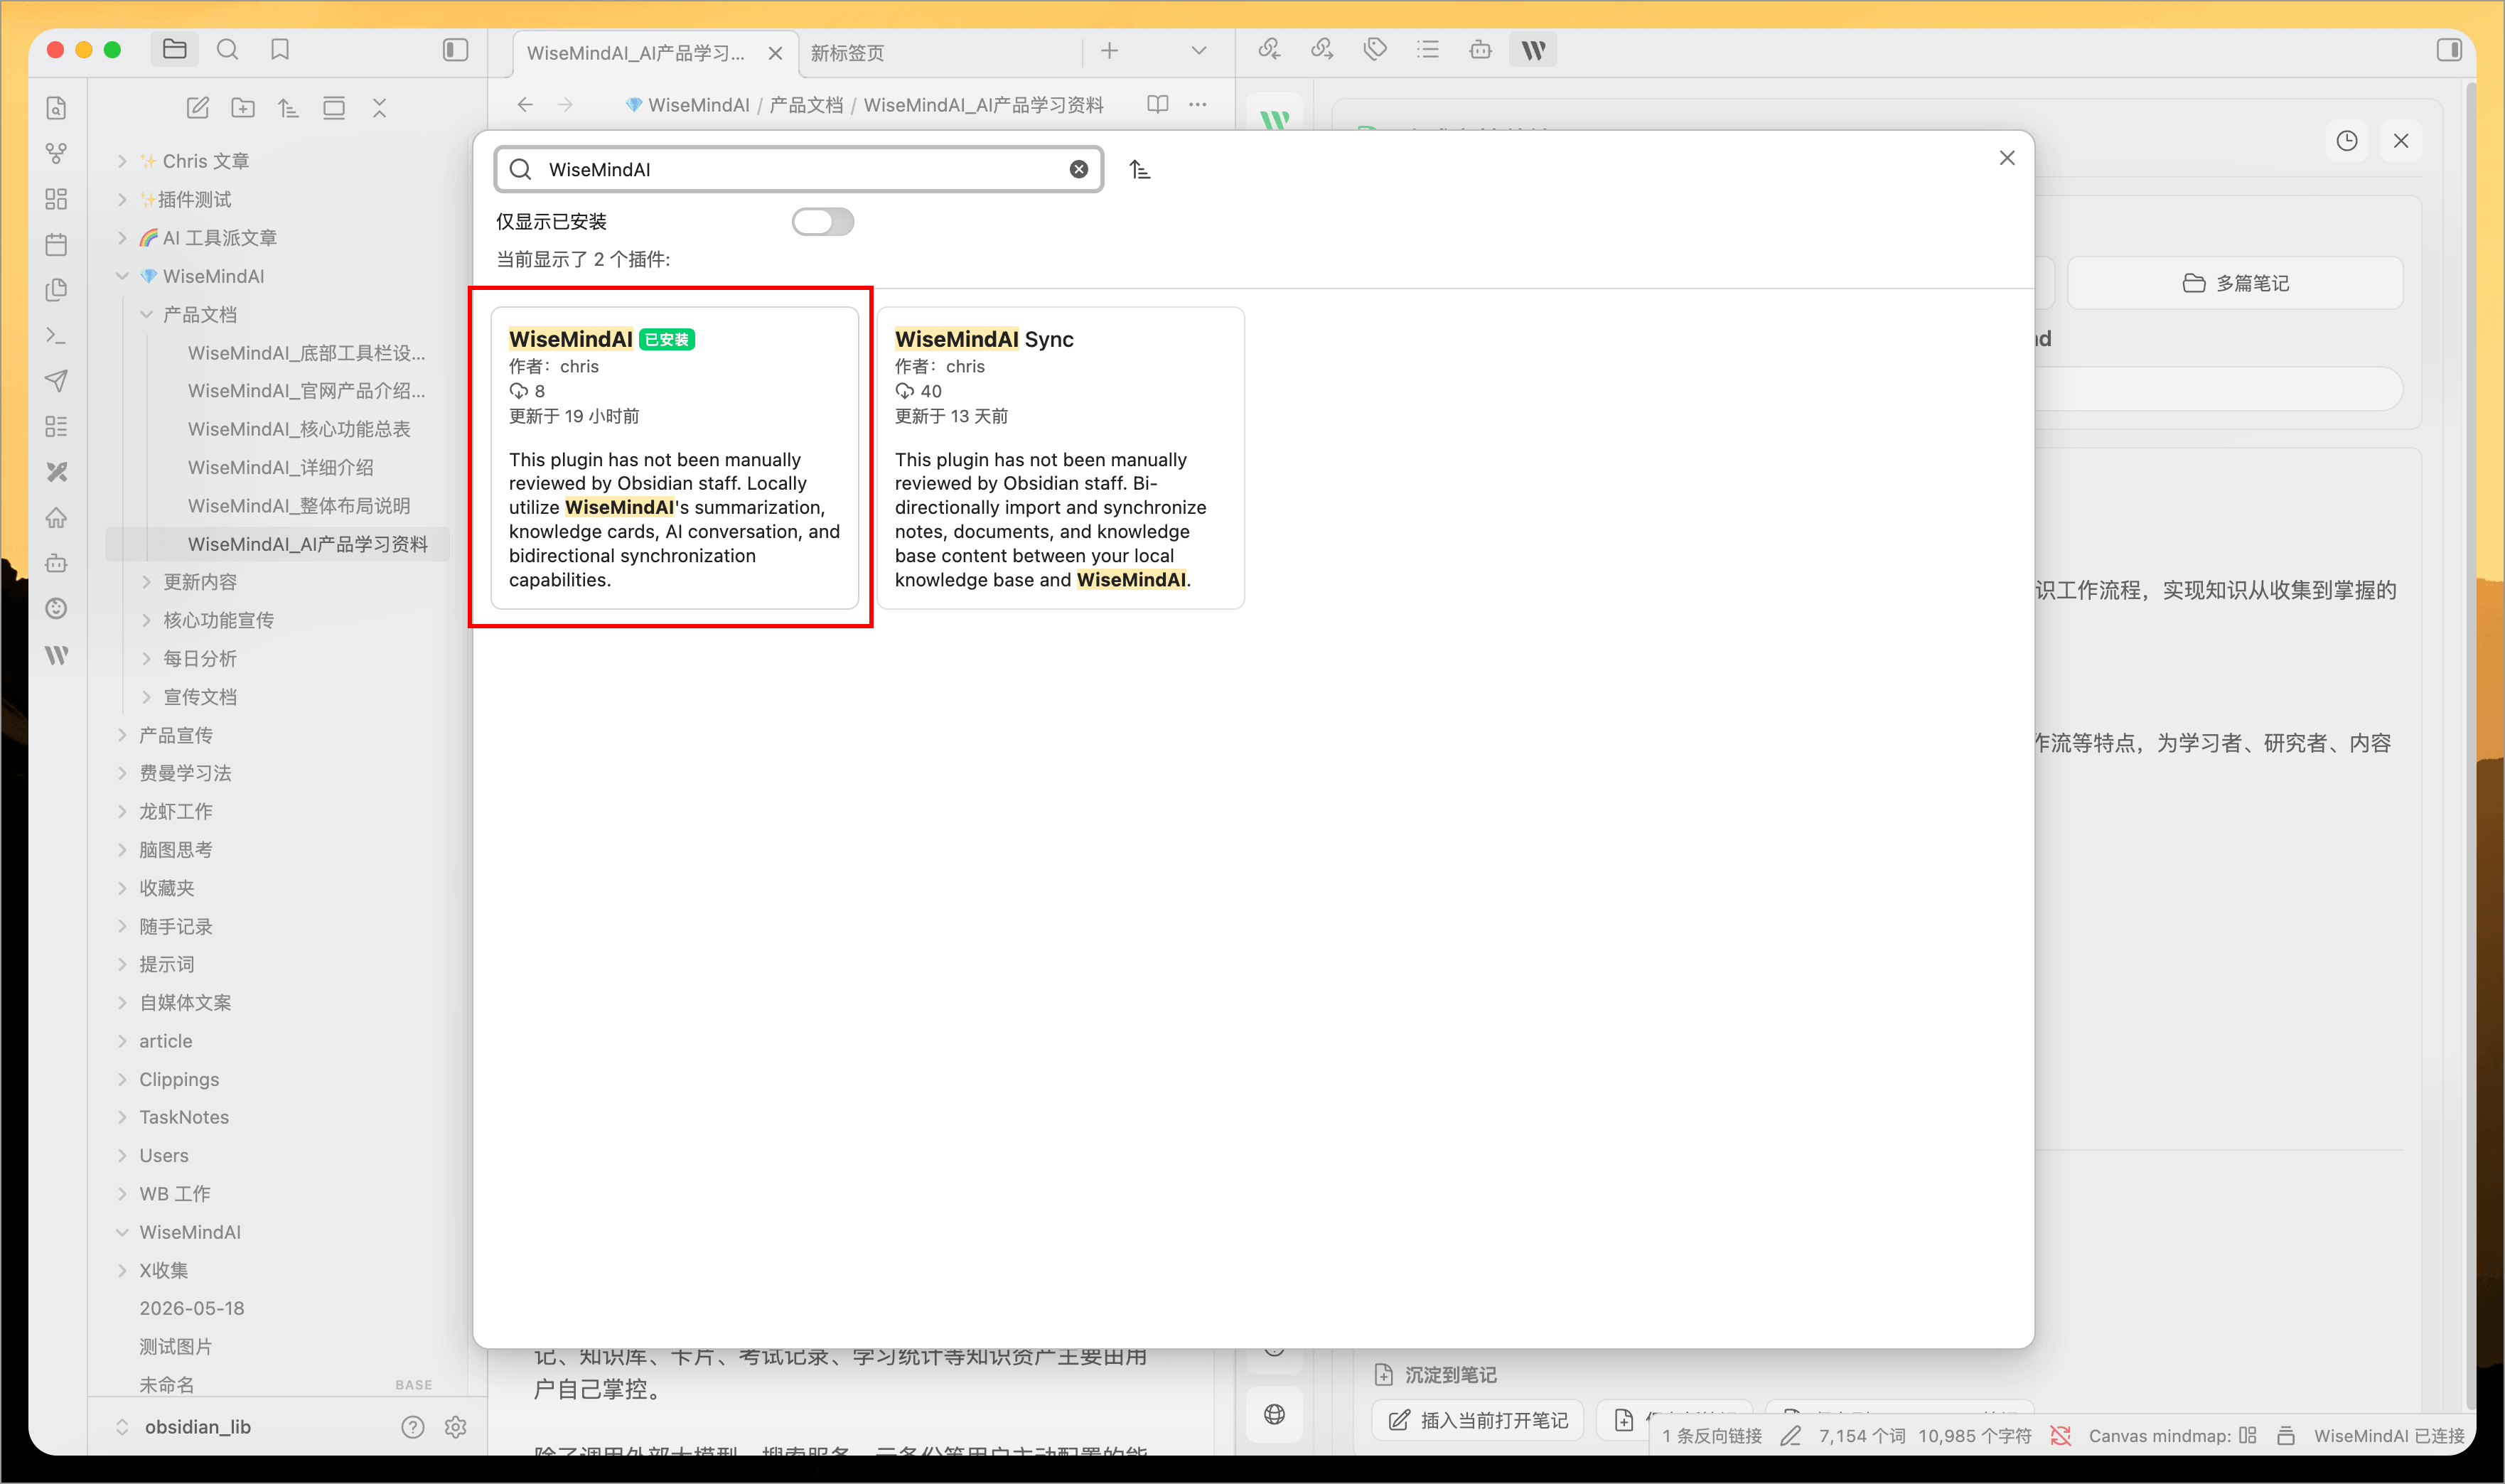
Option 2: Manual install (GitHub)
Download the plugin archive from GitHub Releases, extract it, and place it in your vault’s plugin folder.
Open GitHub Releases- After extracting, confirm the folder contains
main.js,manifest.json, andstyles.css. - In your vault, create
.obsidian/plugins/wisemindai/. - Copy the files into that folder.
- In Obsidian, open Settings → Community plugins and enable WiseMindAI.
Open the plugin panel
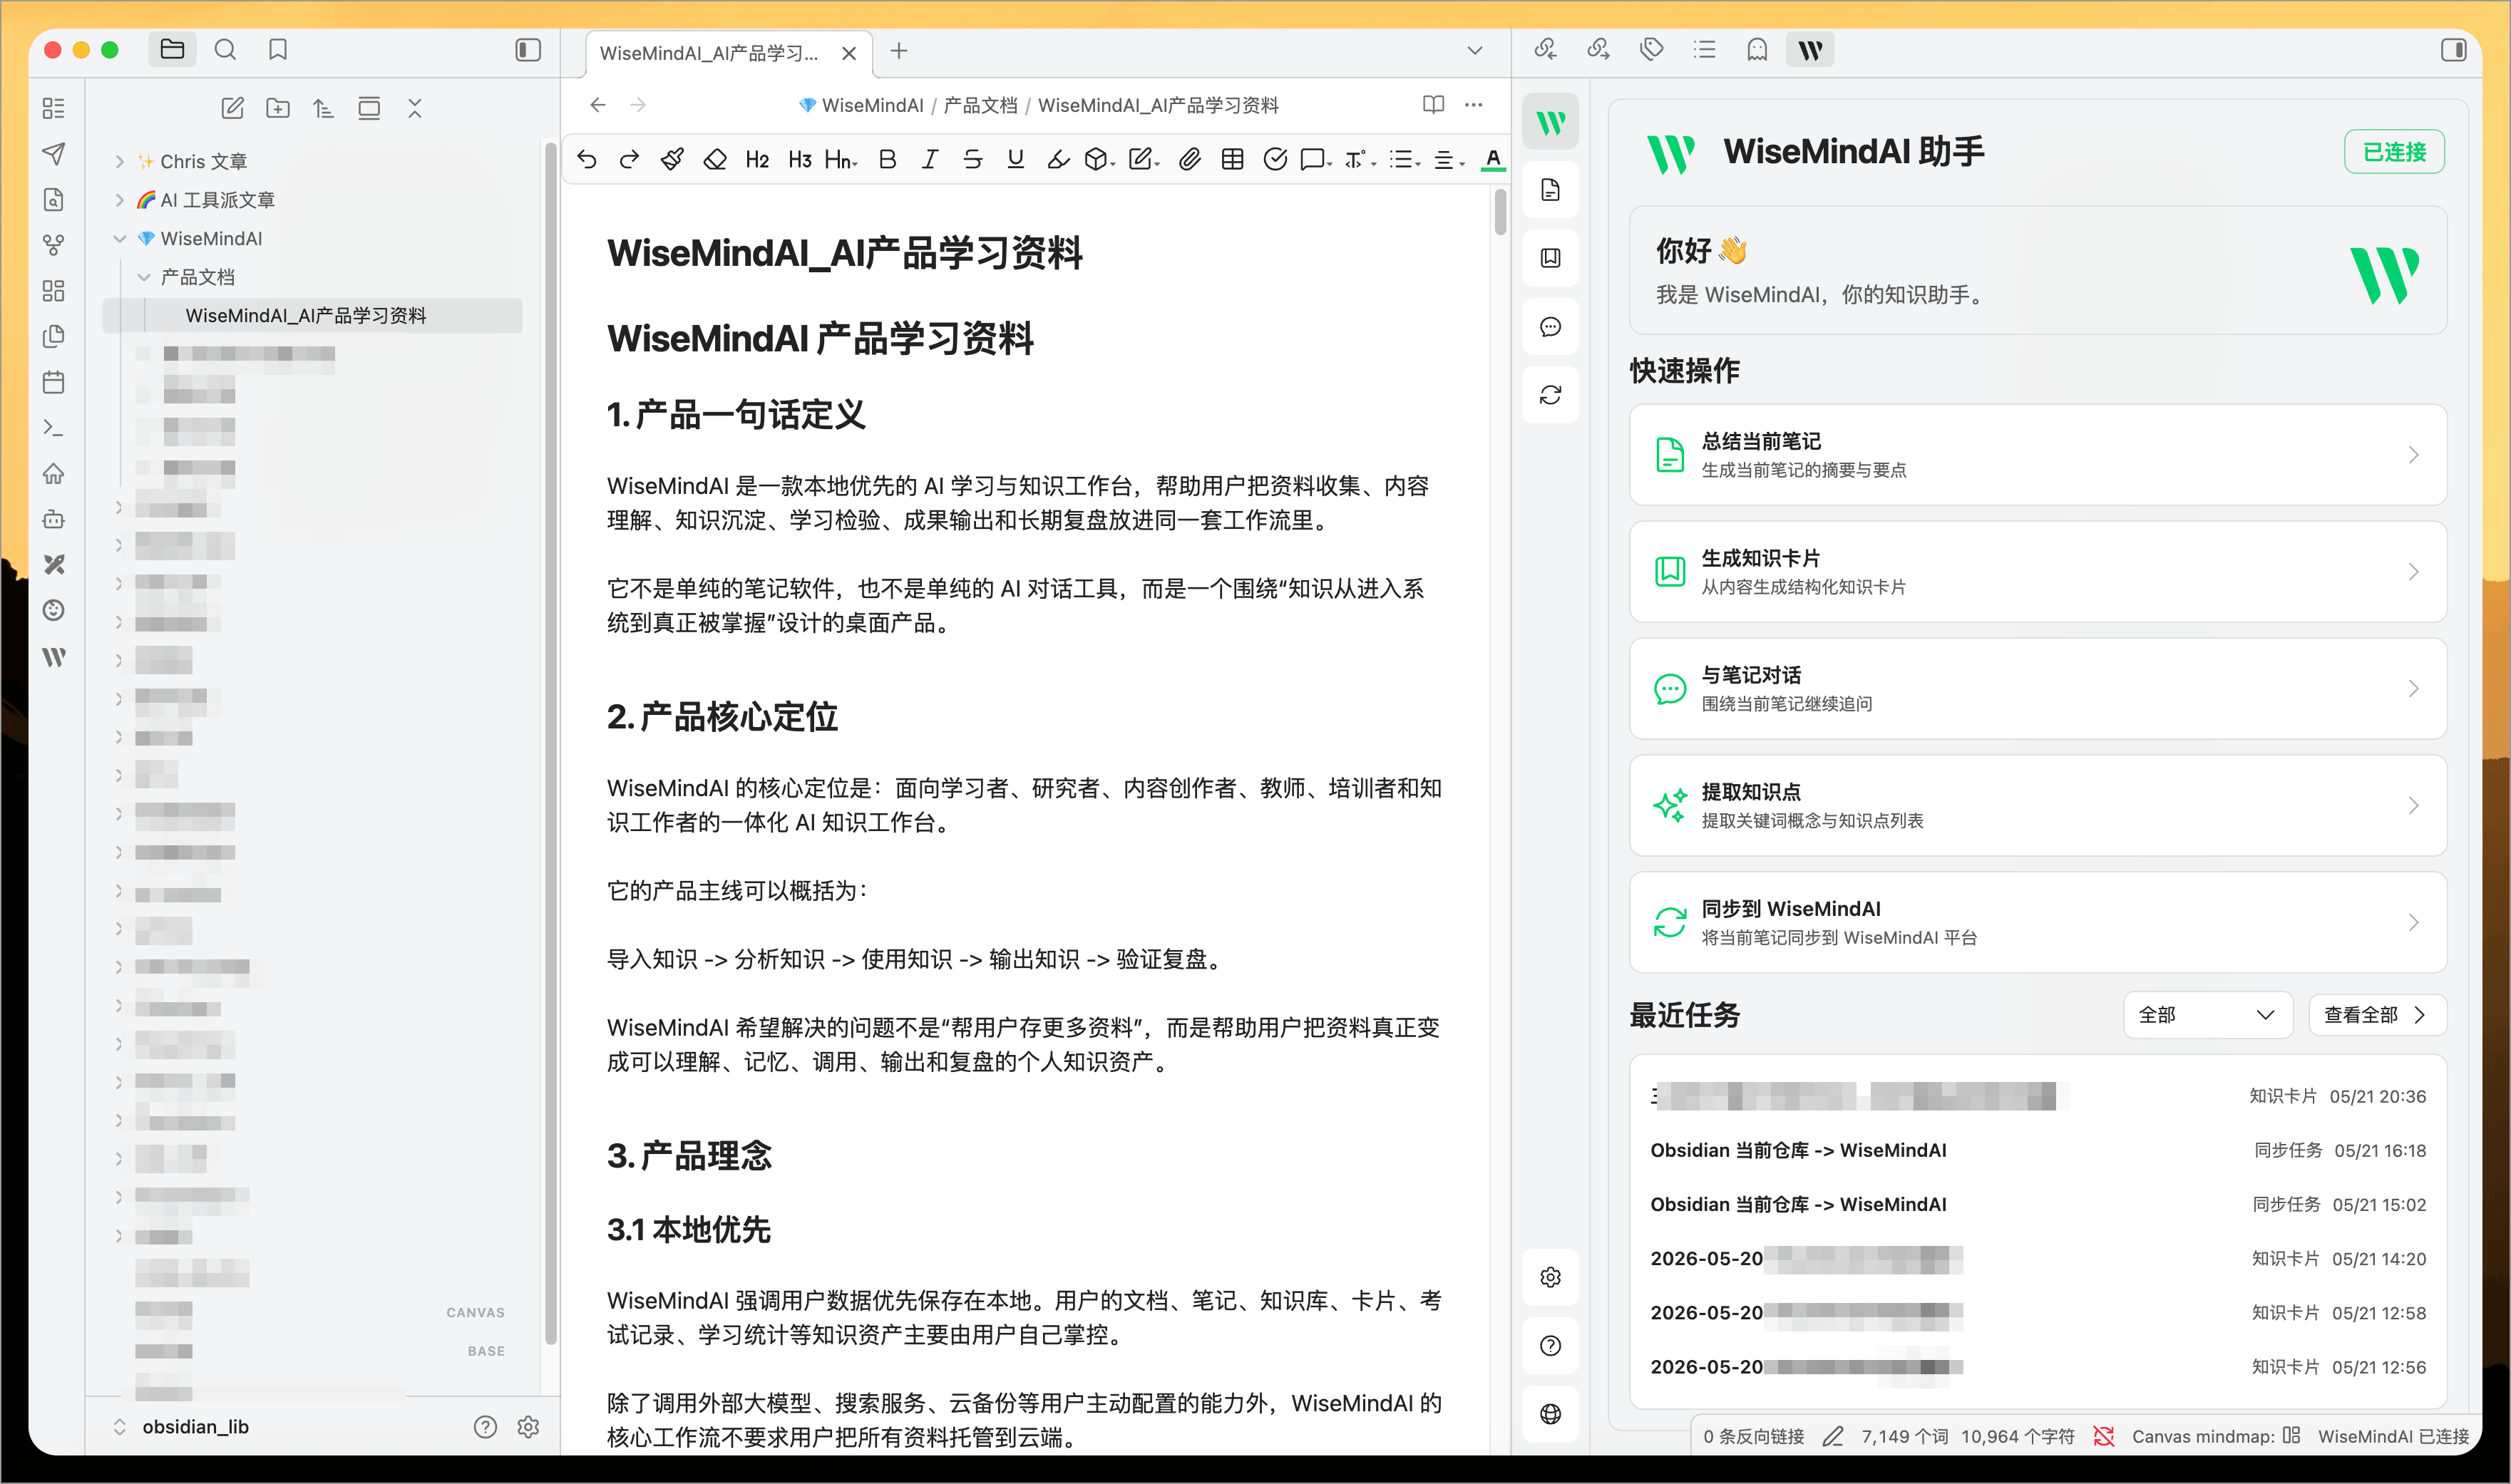
After enabling the plugin, open the WiseMindAI panel in any of these ways:
- Click the WiseMindAI icon in the left sidebar.
- Run
WiseMindAI: Open panelfrom the command palette. - Use the WiseMindAI entry on the bottom status bar.
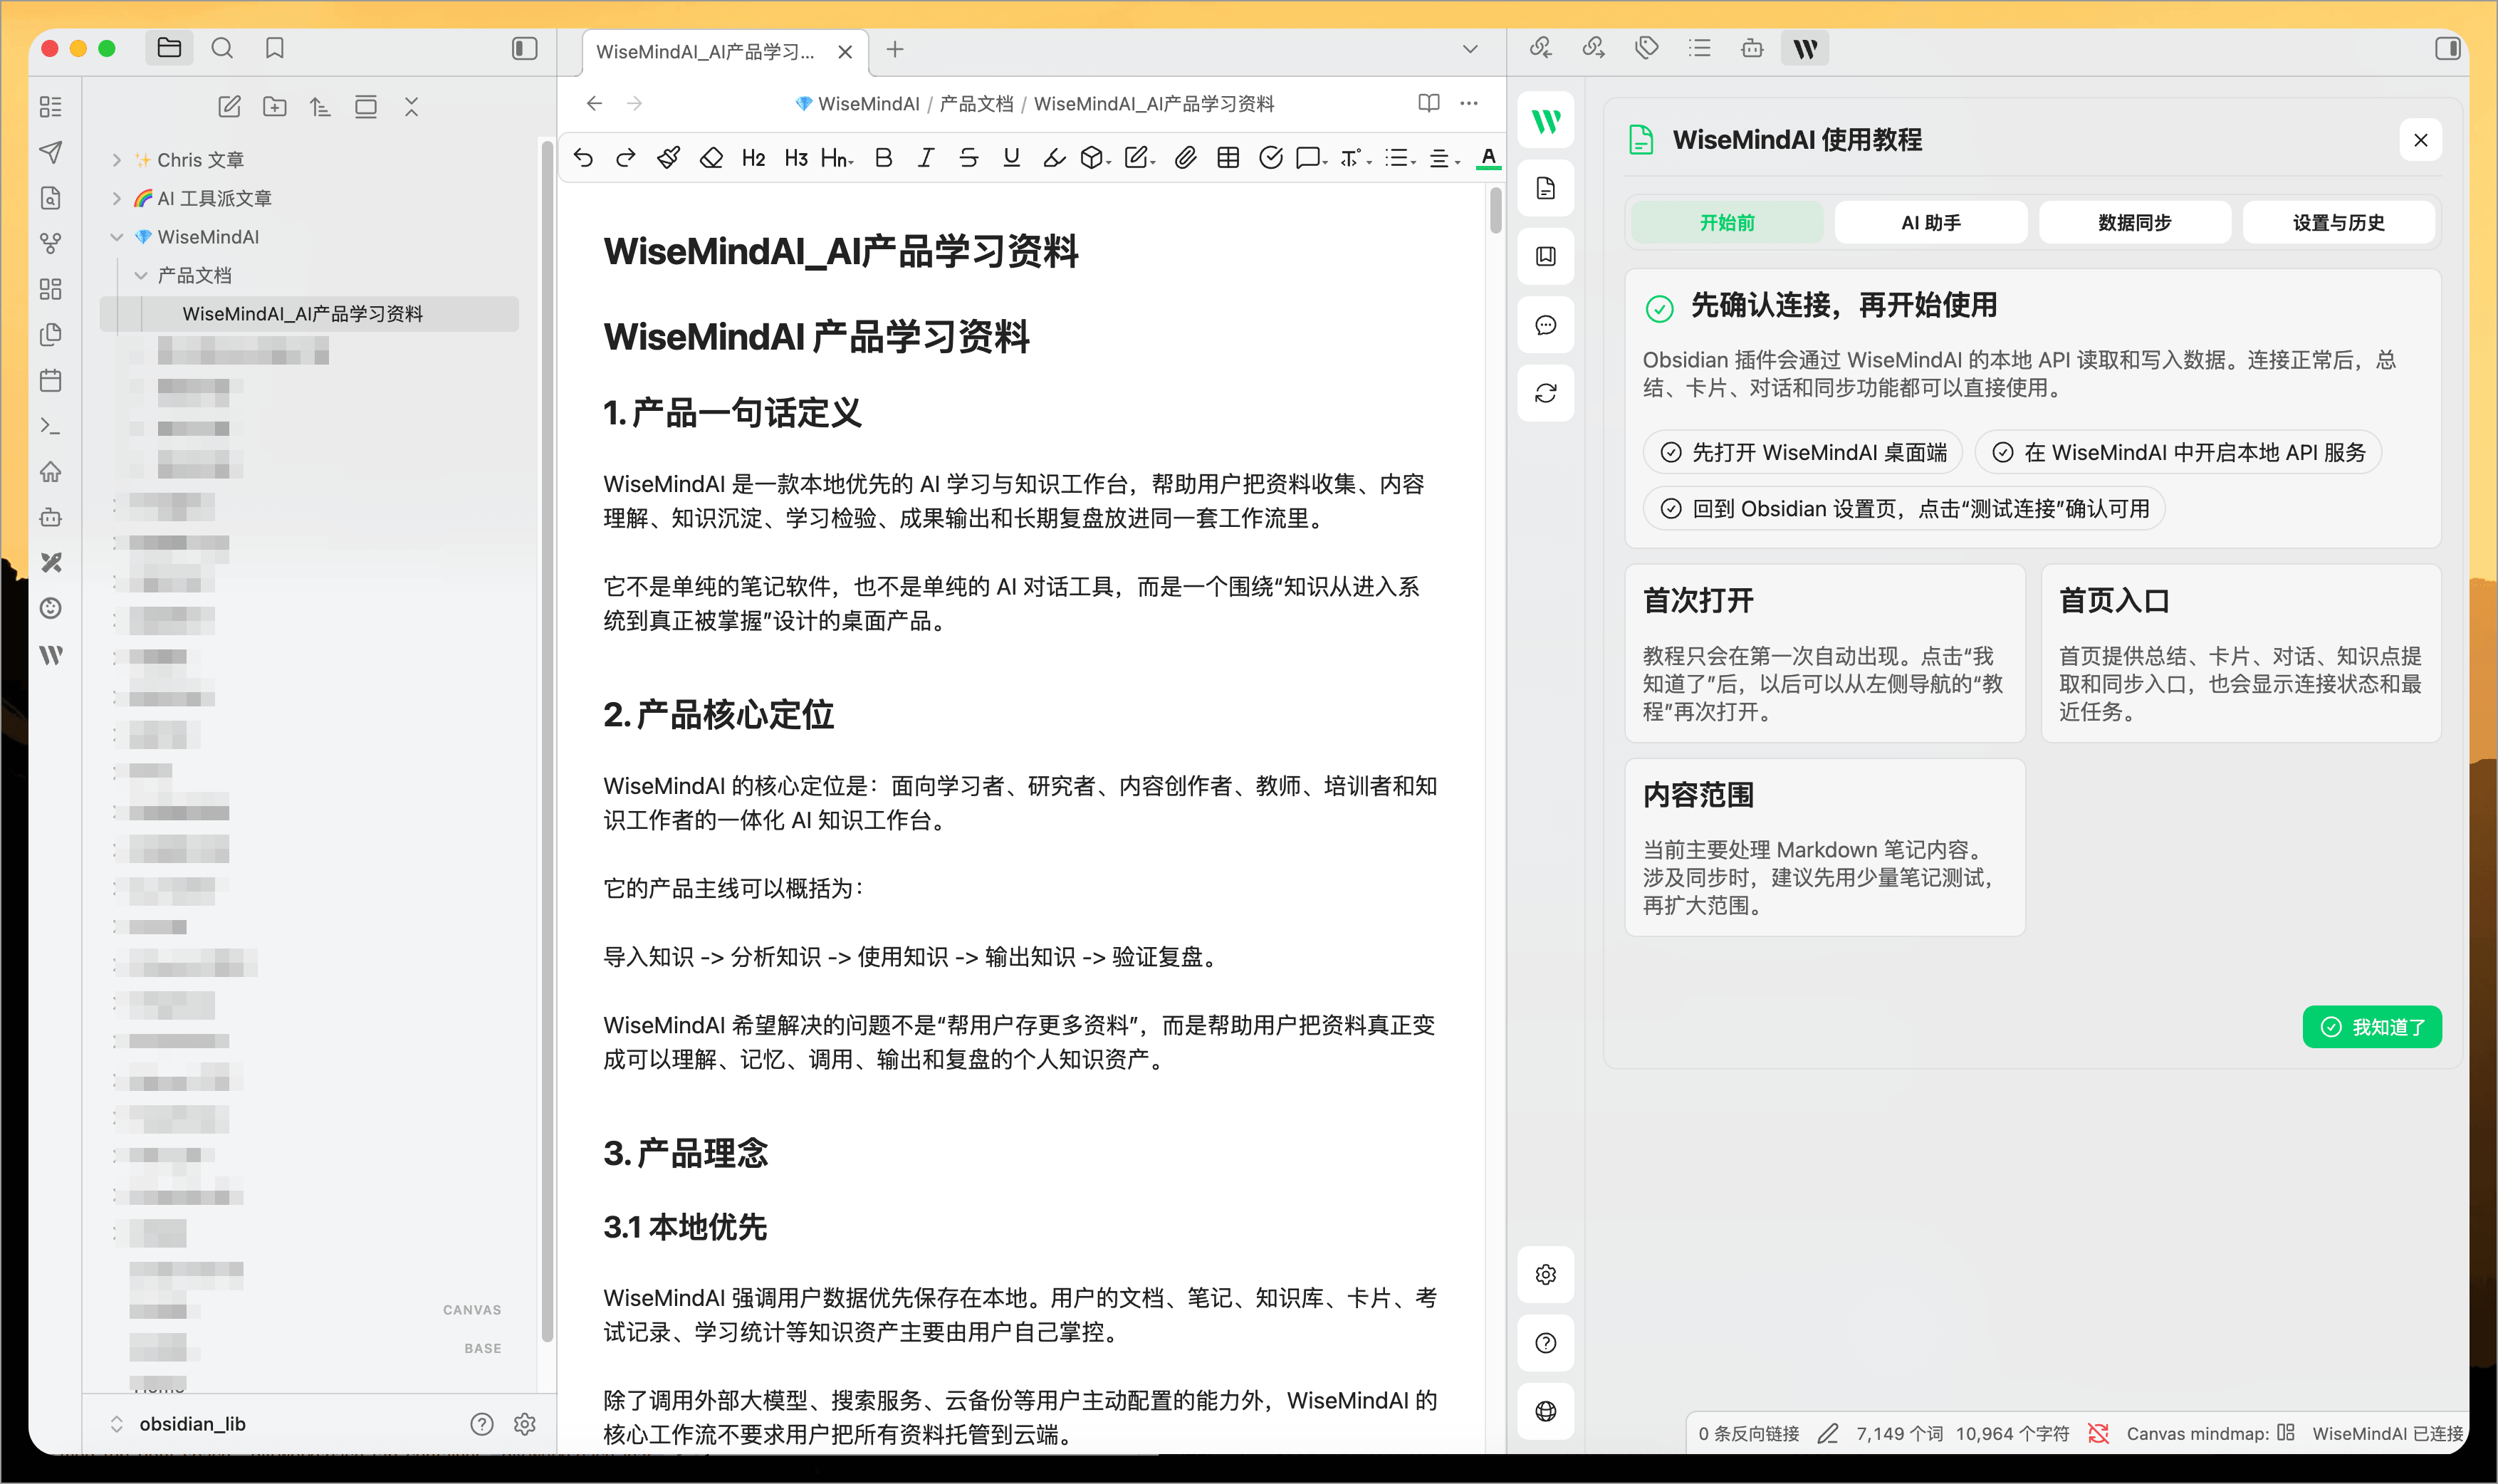
The first time you open it, a short tutorial helps you confirm the basics.
Core features
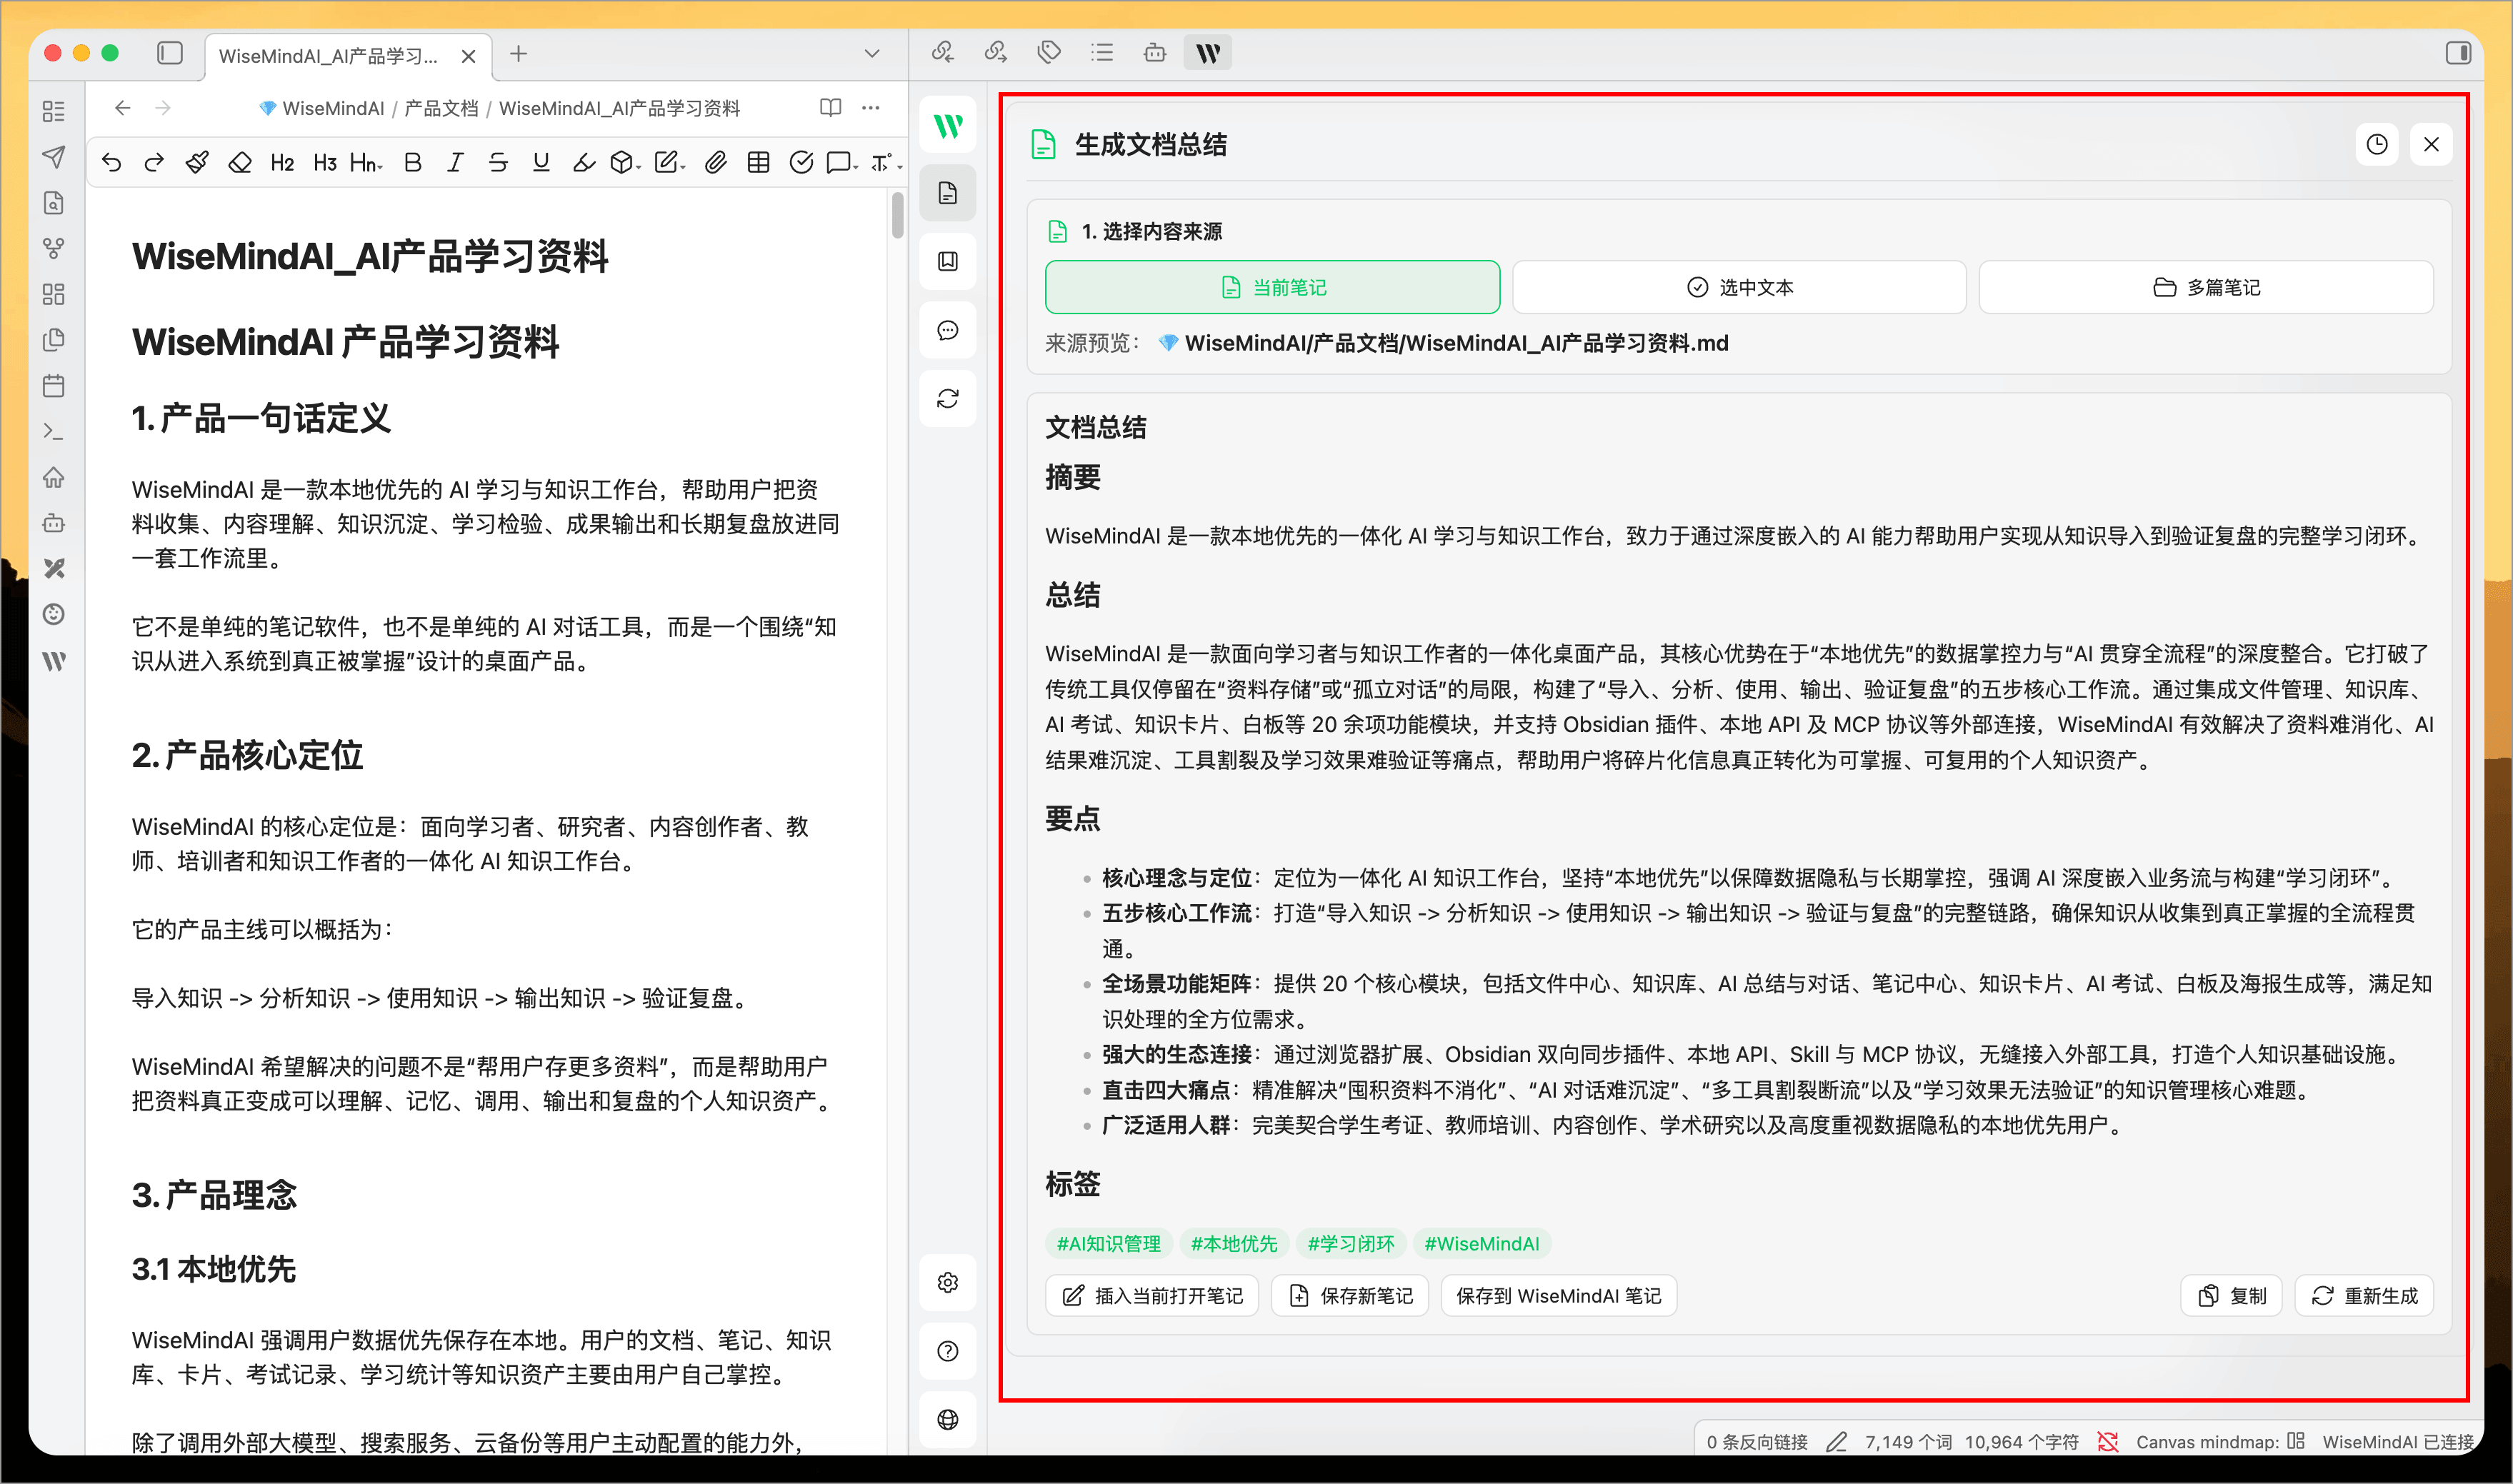
Summarize notes
Ask WiseMindAI to summarize the current note, selected text, or multiple notes. You can copy the result, insert it into the current note, or save it as a WiseMindAI note.
Useful for long articles, meeting notes, study materials, and reading notes.
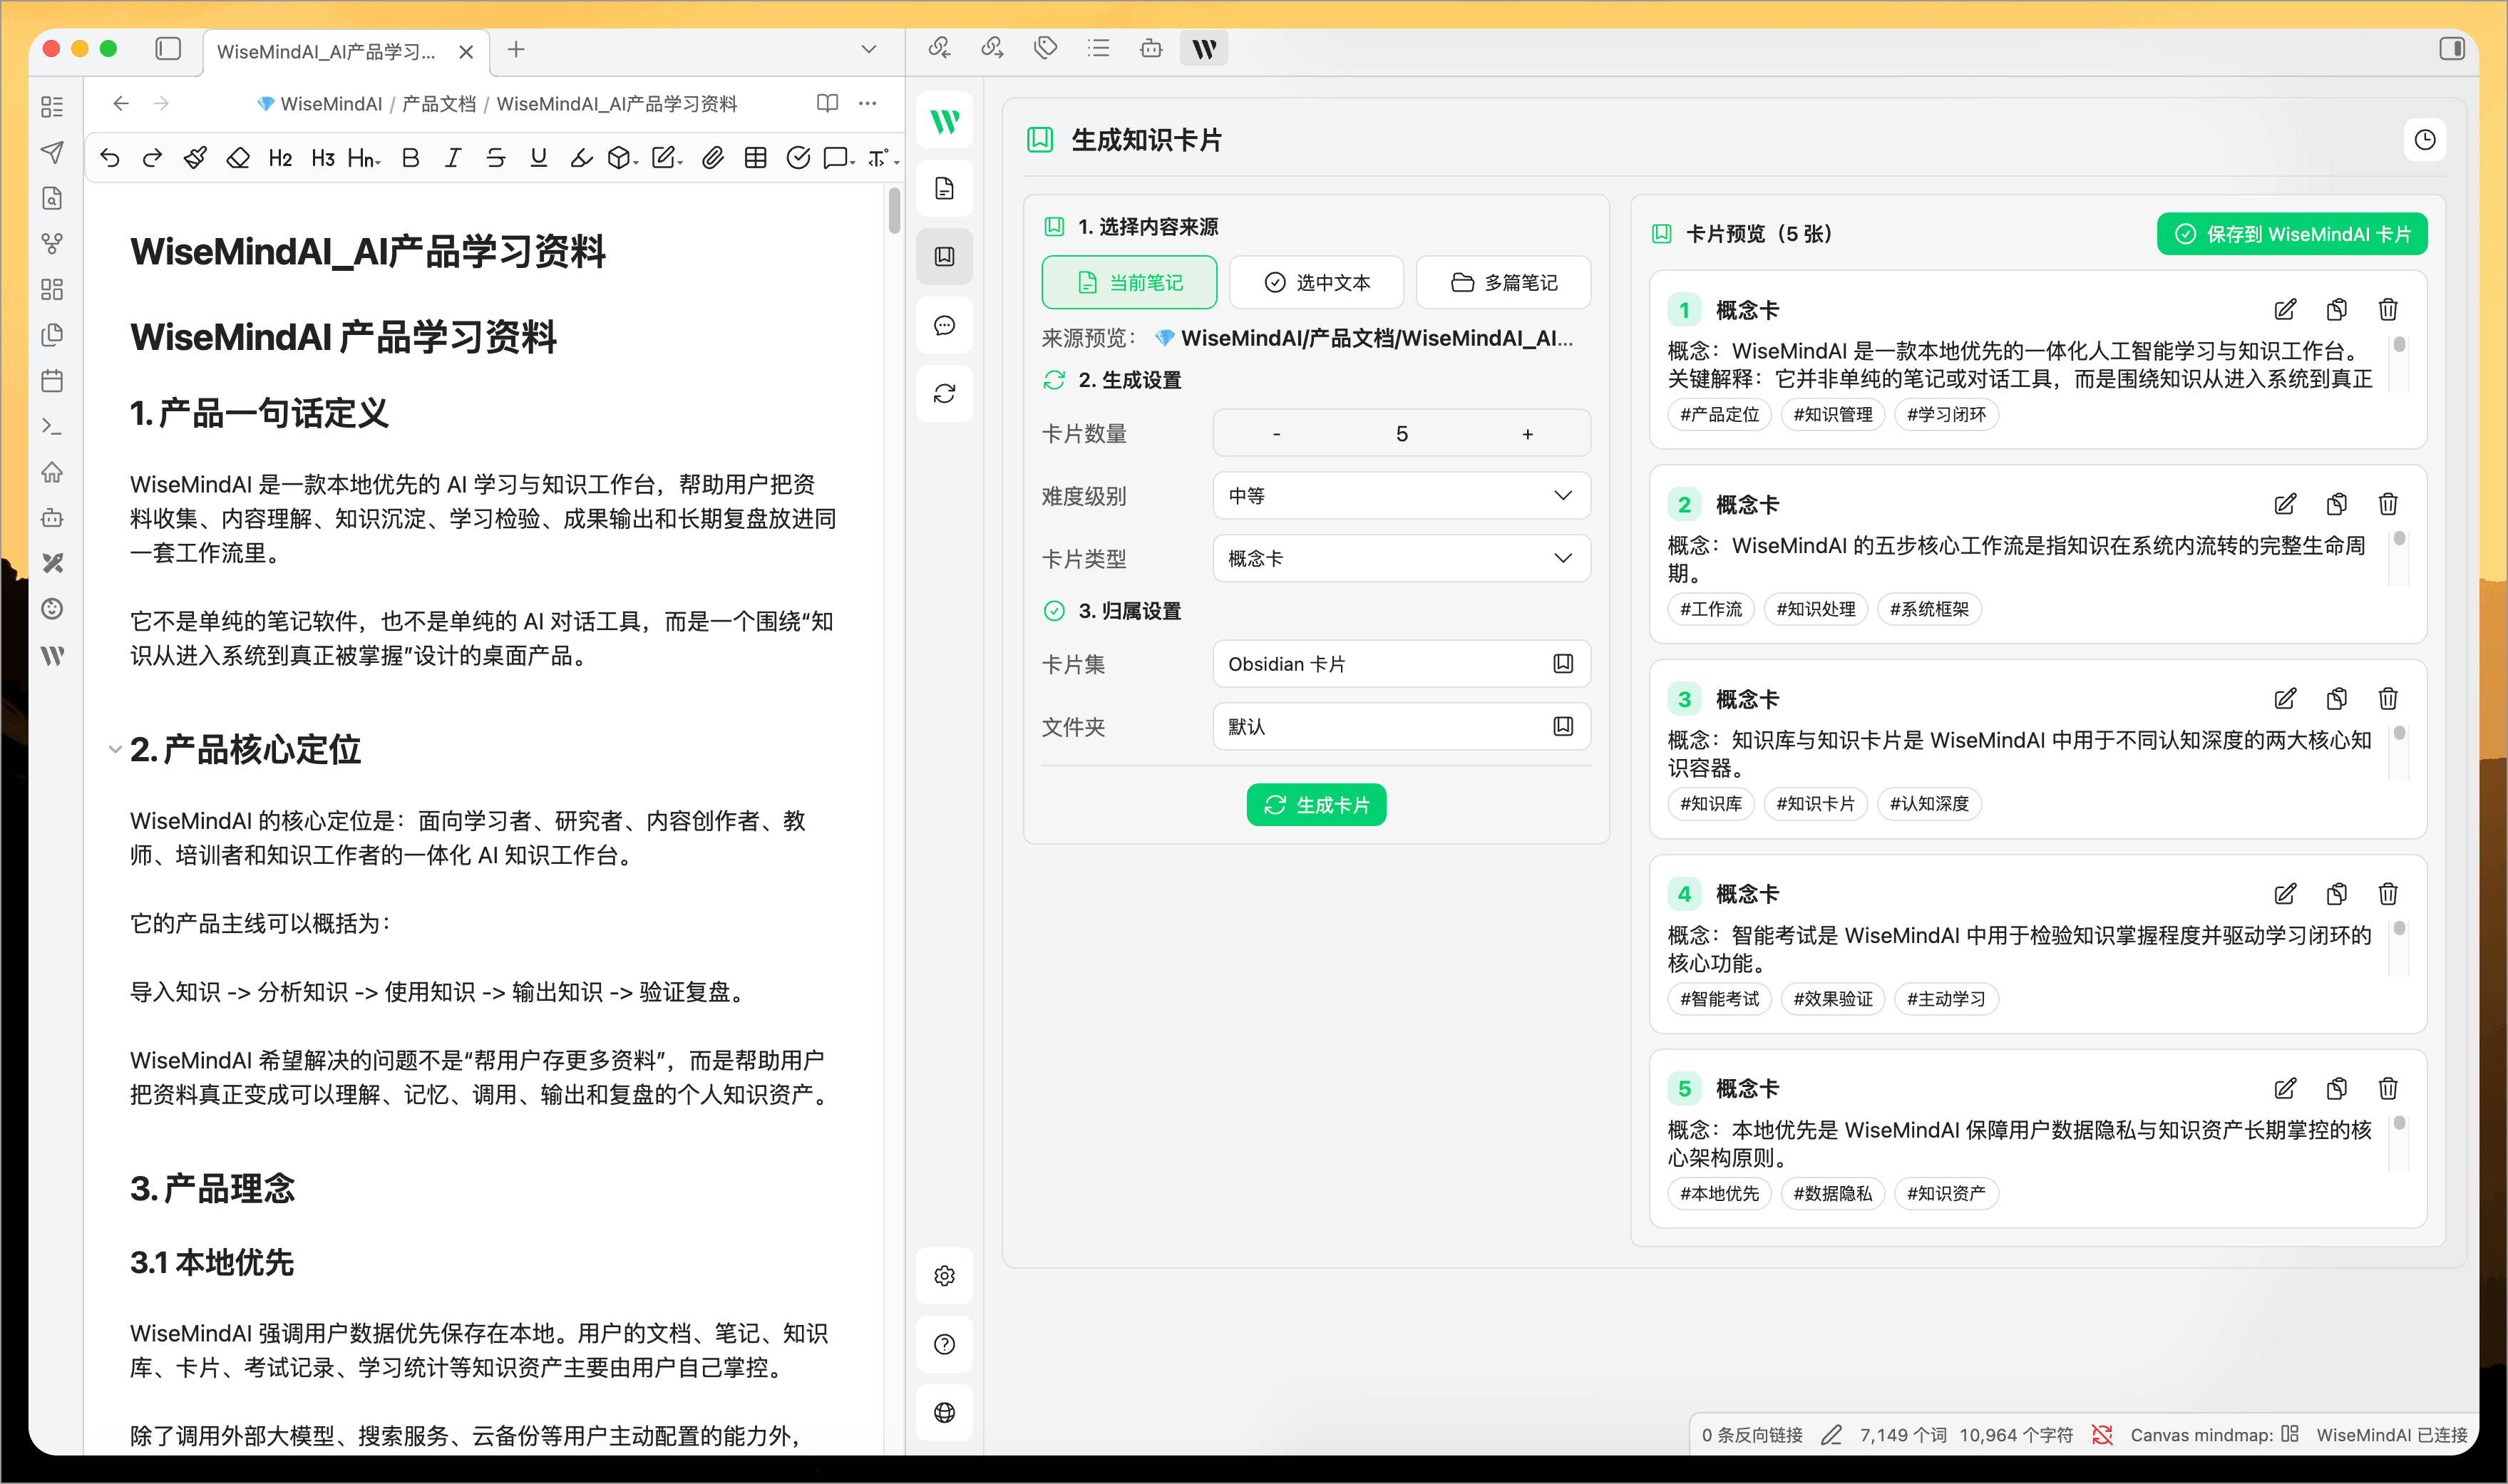
Generate knowledge cards
The plugin can generate knowledge cards from Obsidian notes. Set count, difficulty, and type—Q&A, concept, or mixed.
Preview and edit before saving to a WiseMindAI card deck for later review.
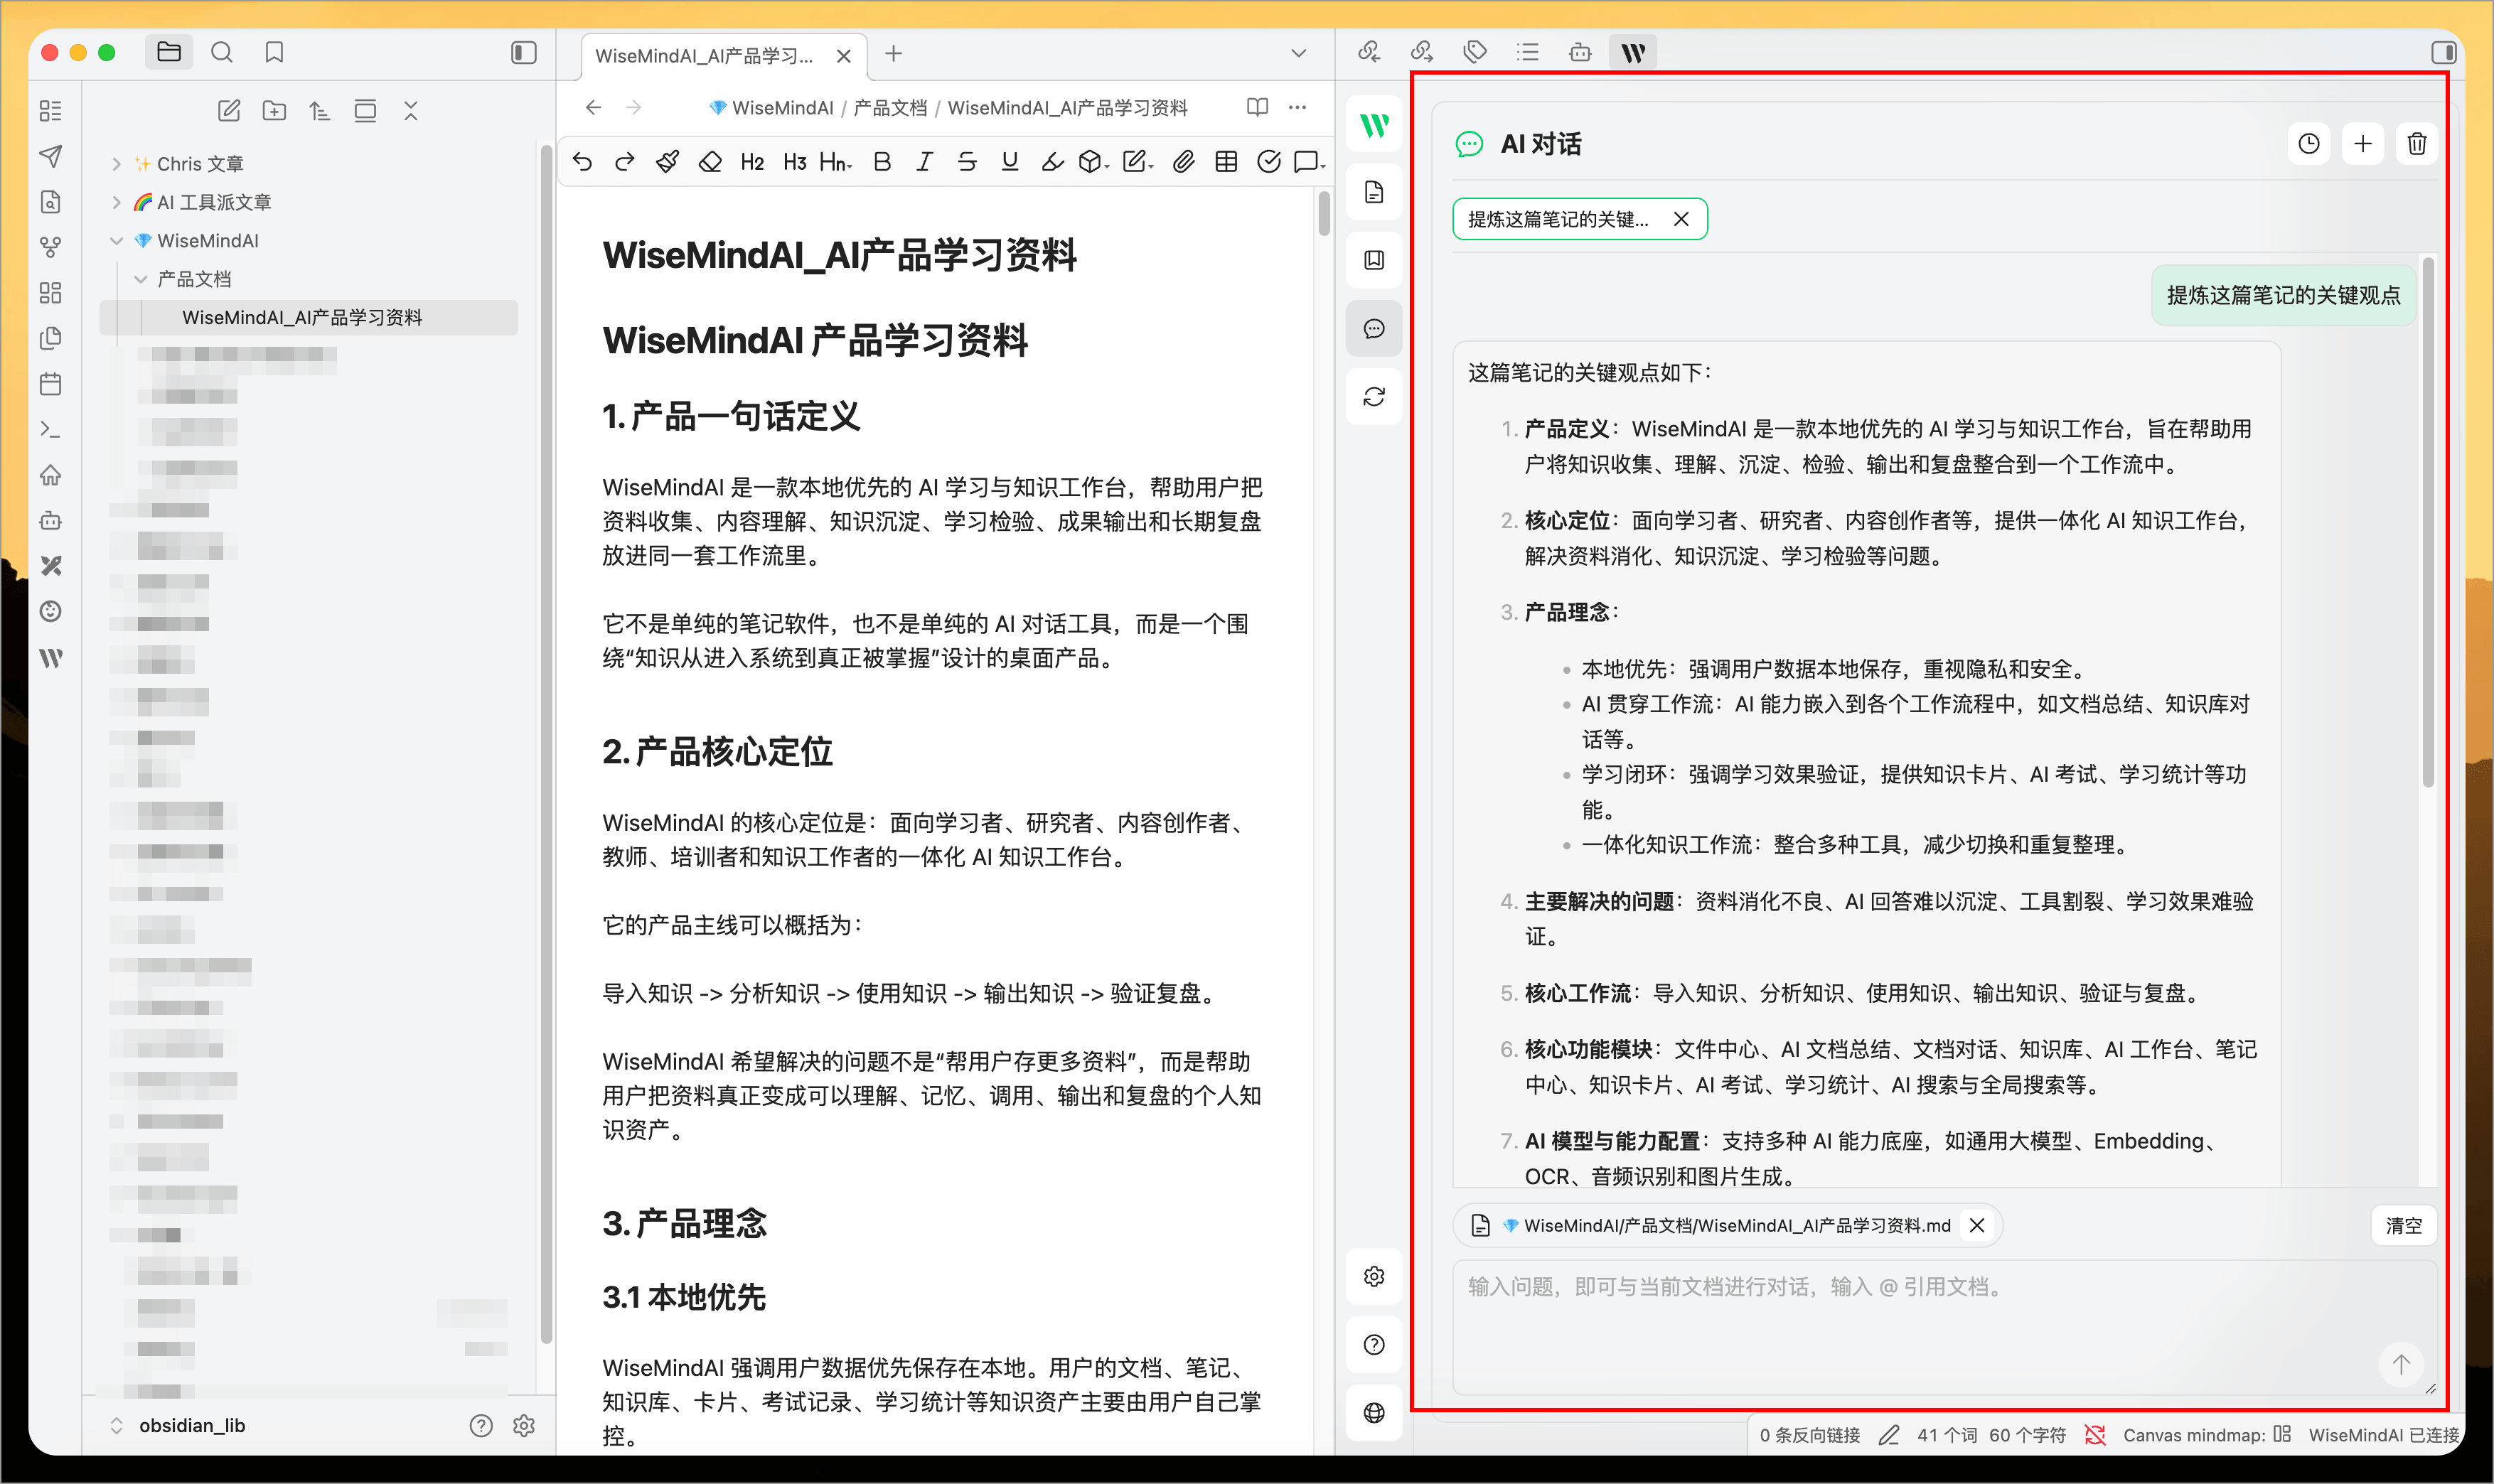
Chat with notes
On the Chat page, ask follow-up questions about the current note—explain a concept, pull out key points, or suggest what to explore next.
Type @ in the input to reference other notes so WiseMindAI can use multiple sources. Copy answers or insert them into the current note.
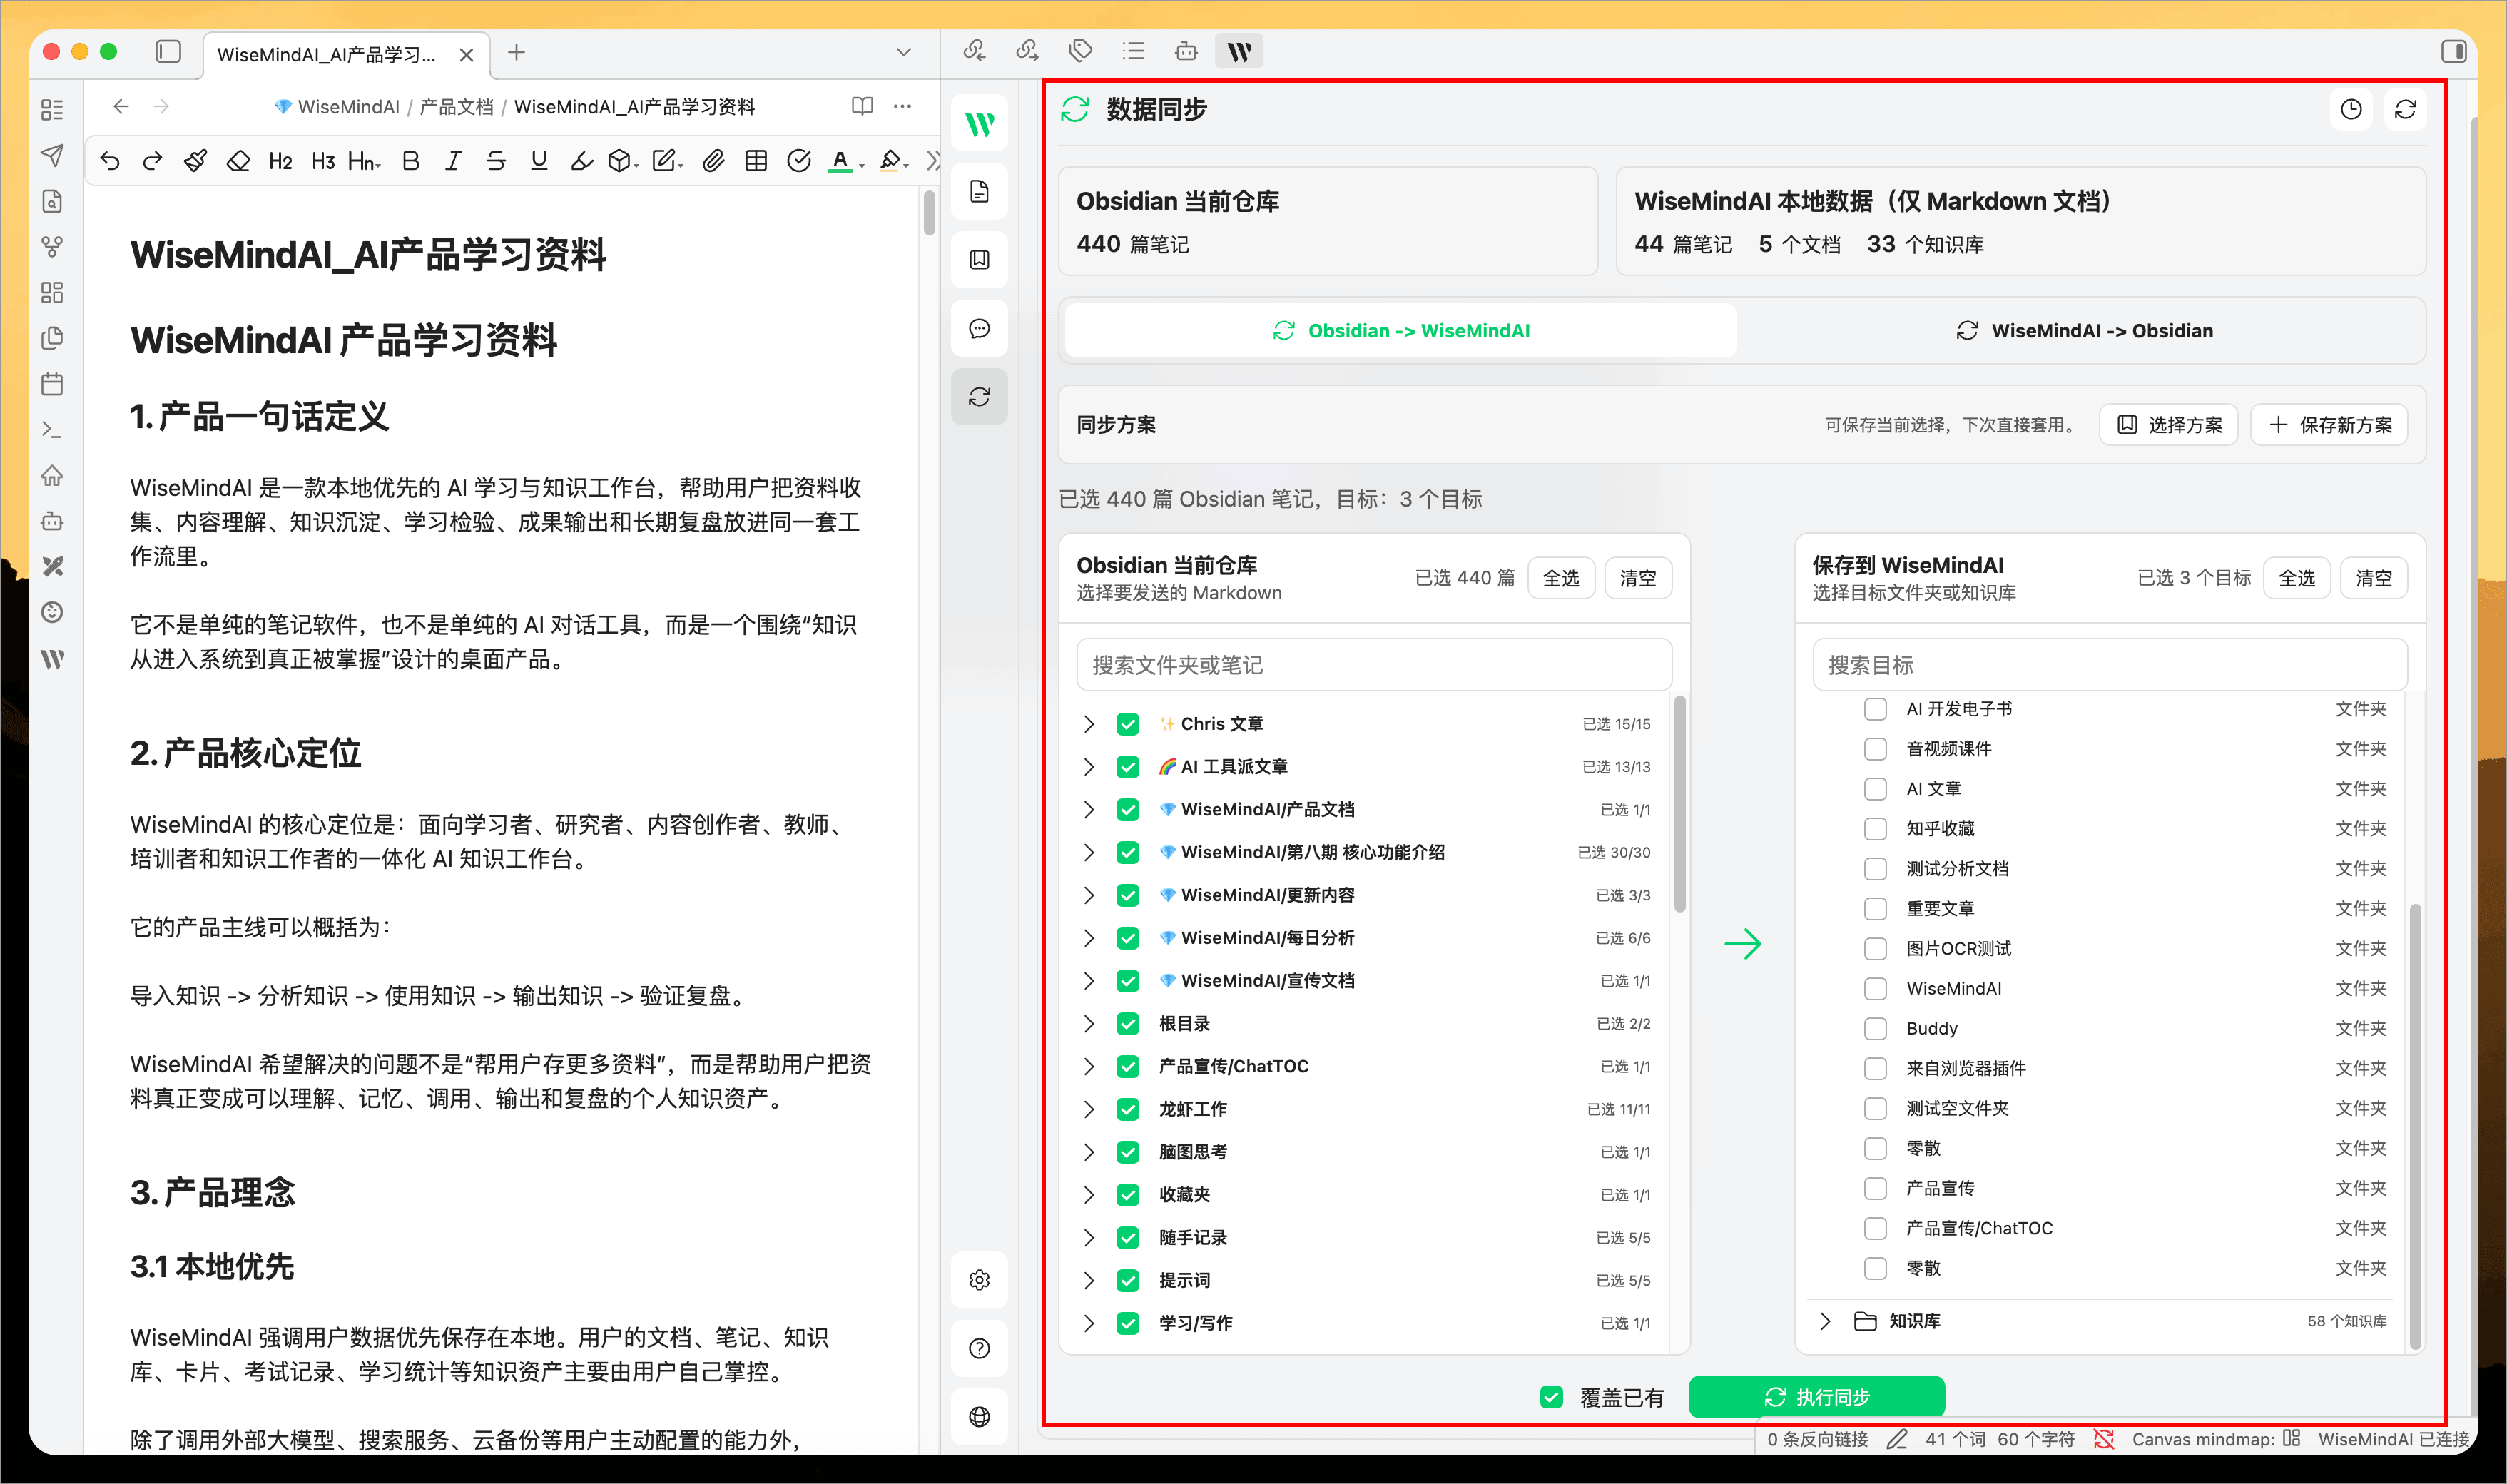
Two-way content sync
Sync works both ways between Obsidian and WiseMindAI.
Obsidian → WiseMindAI
Sync Markdown notes from Obsidian into WiseMindAI as notes, documents, or knowledge base content.
WiseMindAI → Obsidian
Write WiseMindAI notes, documents, and knowledge base documents back to Obsidian for further editing.
When syncing, choose what to include, target folders, whether to keep folder hierarchy, and whether to overwrite existing content.
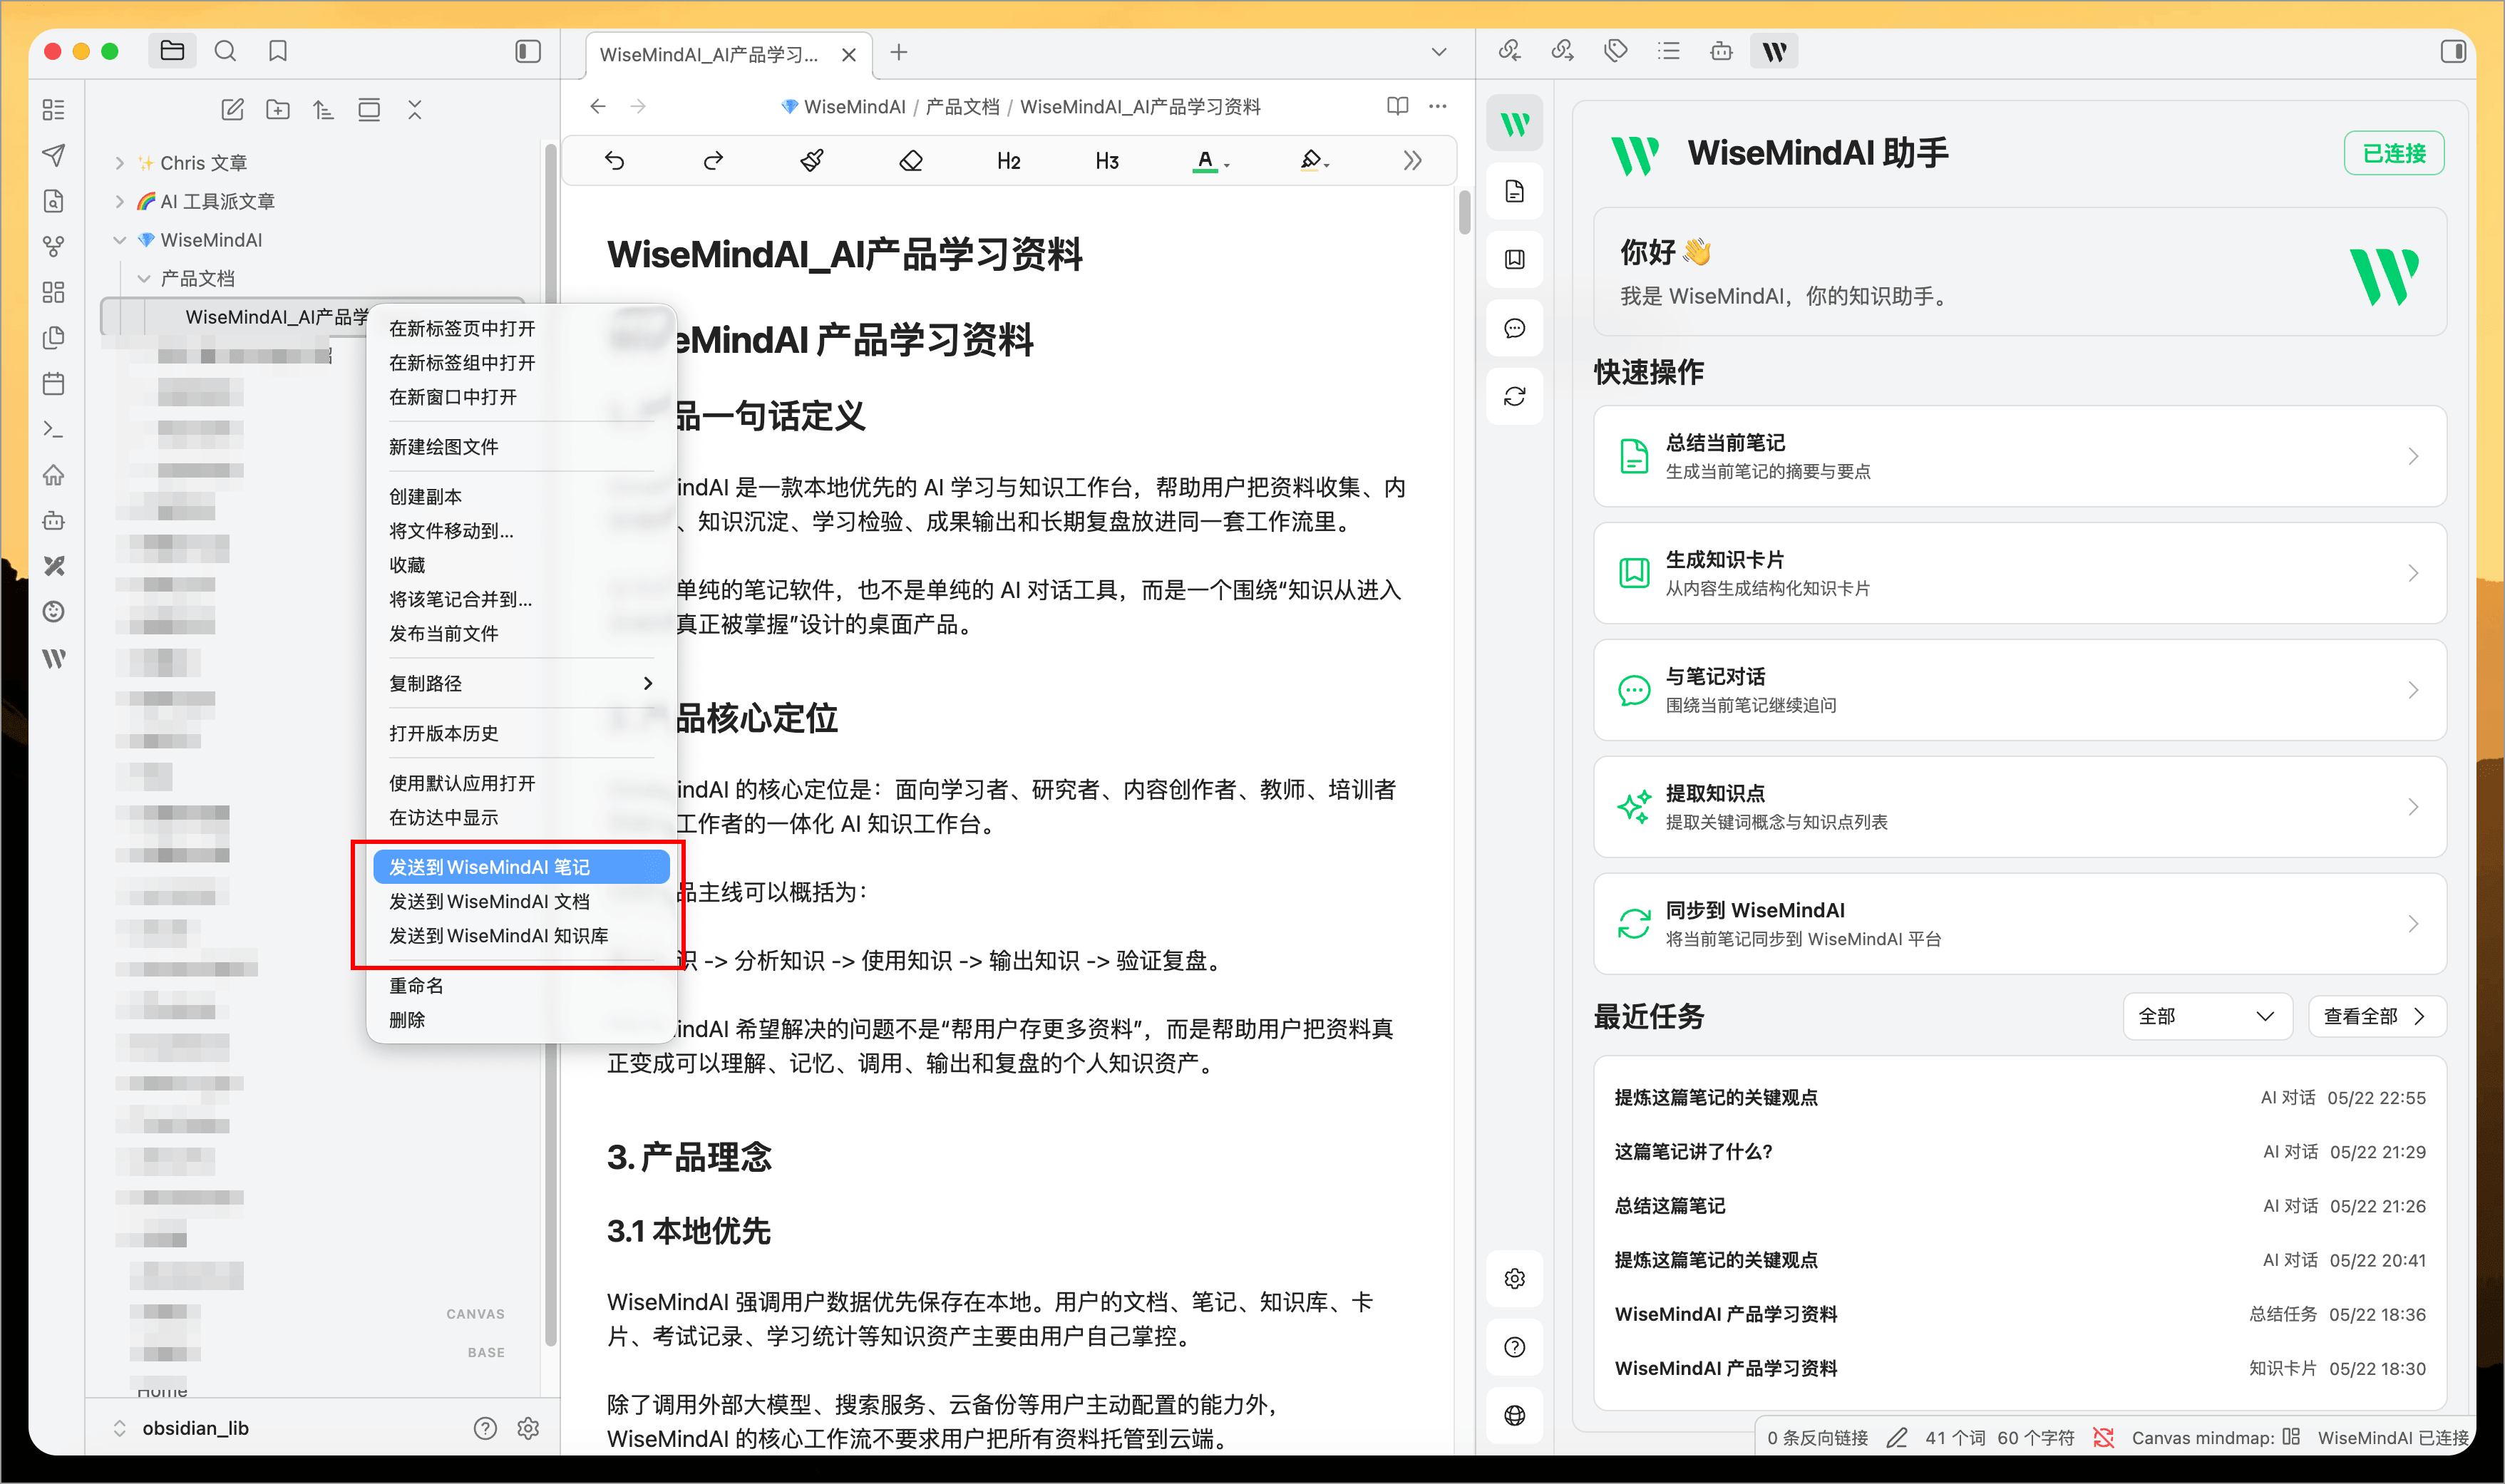
Right-click shortcuts
The plugin adds context menu entries in Obsidian:
- Right-click a Markdown file to send it to WiseMindAI.
- Right-click a folder to send all Markdown notes inside.
- Right-click in the editor to send the current note.
- With text selected, send only that selection, or summarize or generate cards from it.
For one-off notes or excerpts, the context menu is usually faster.
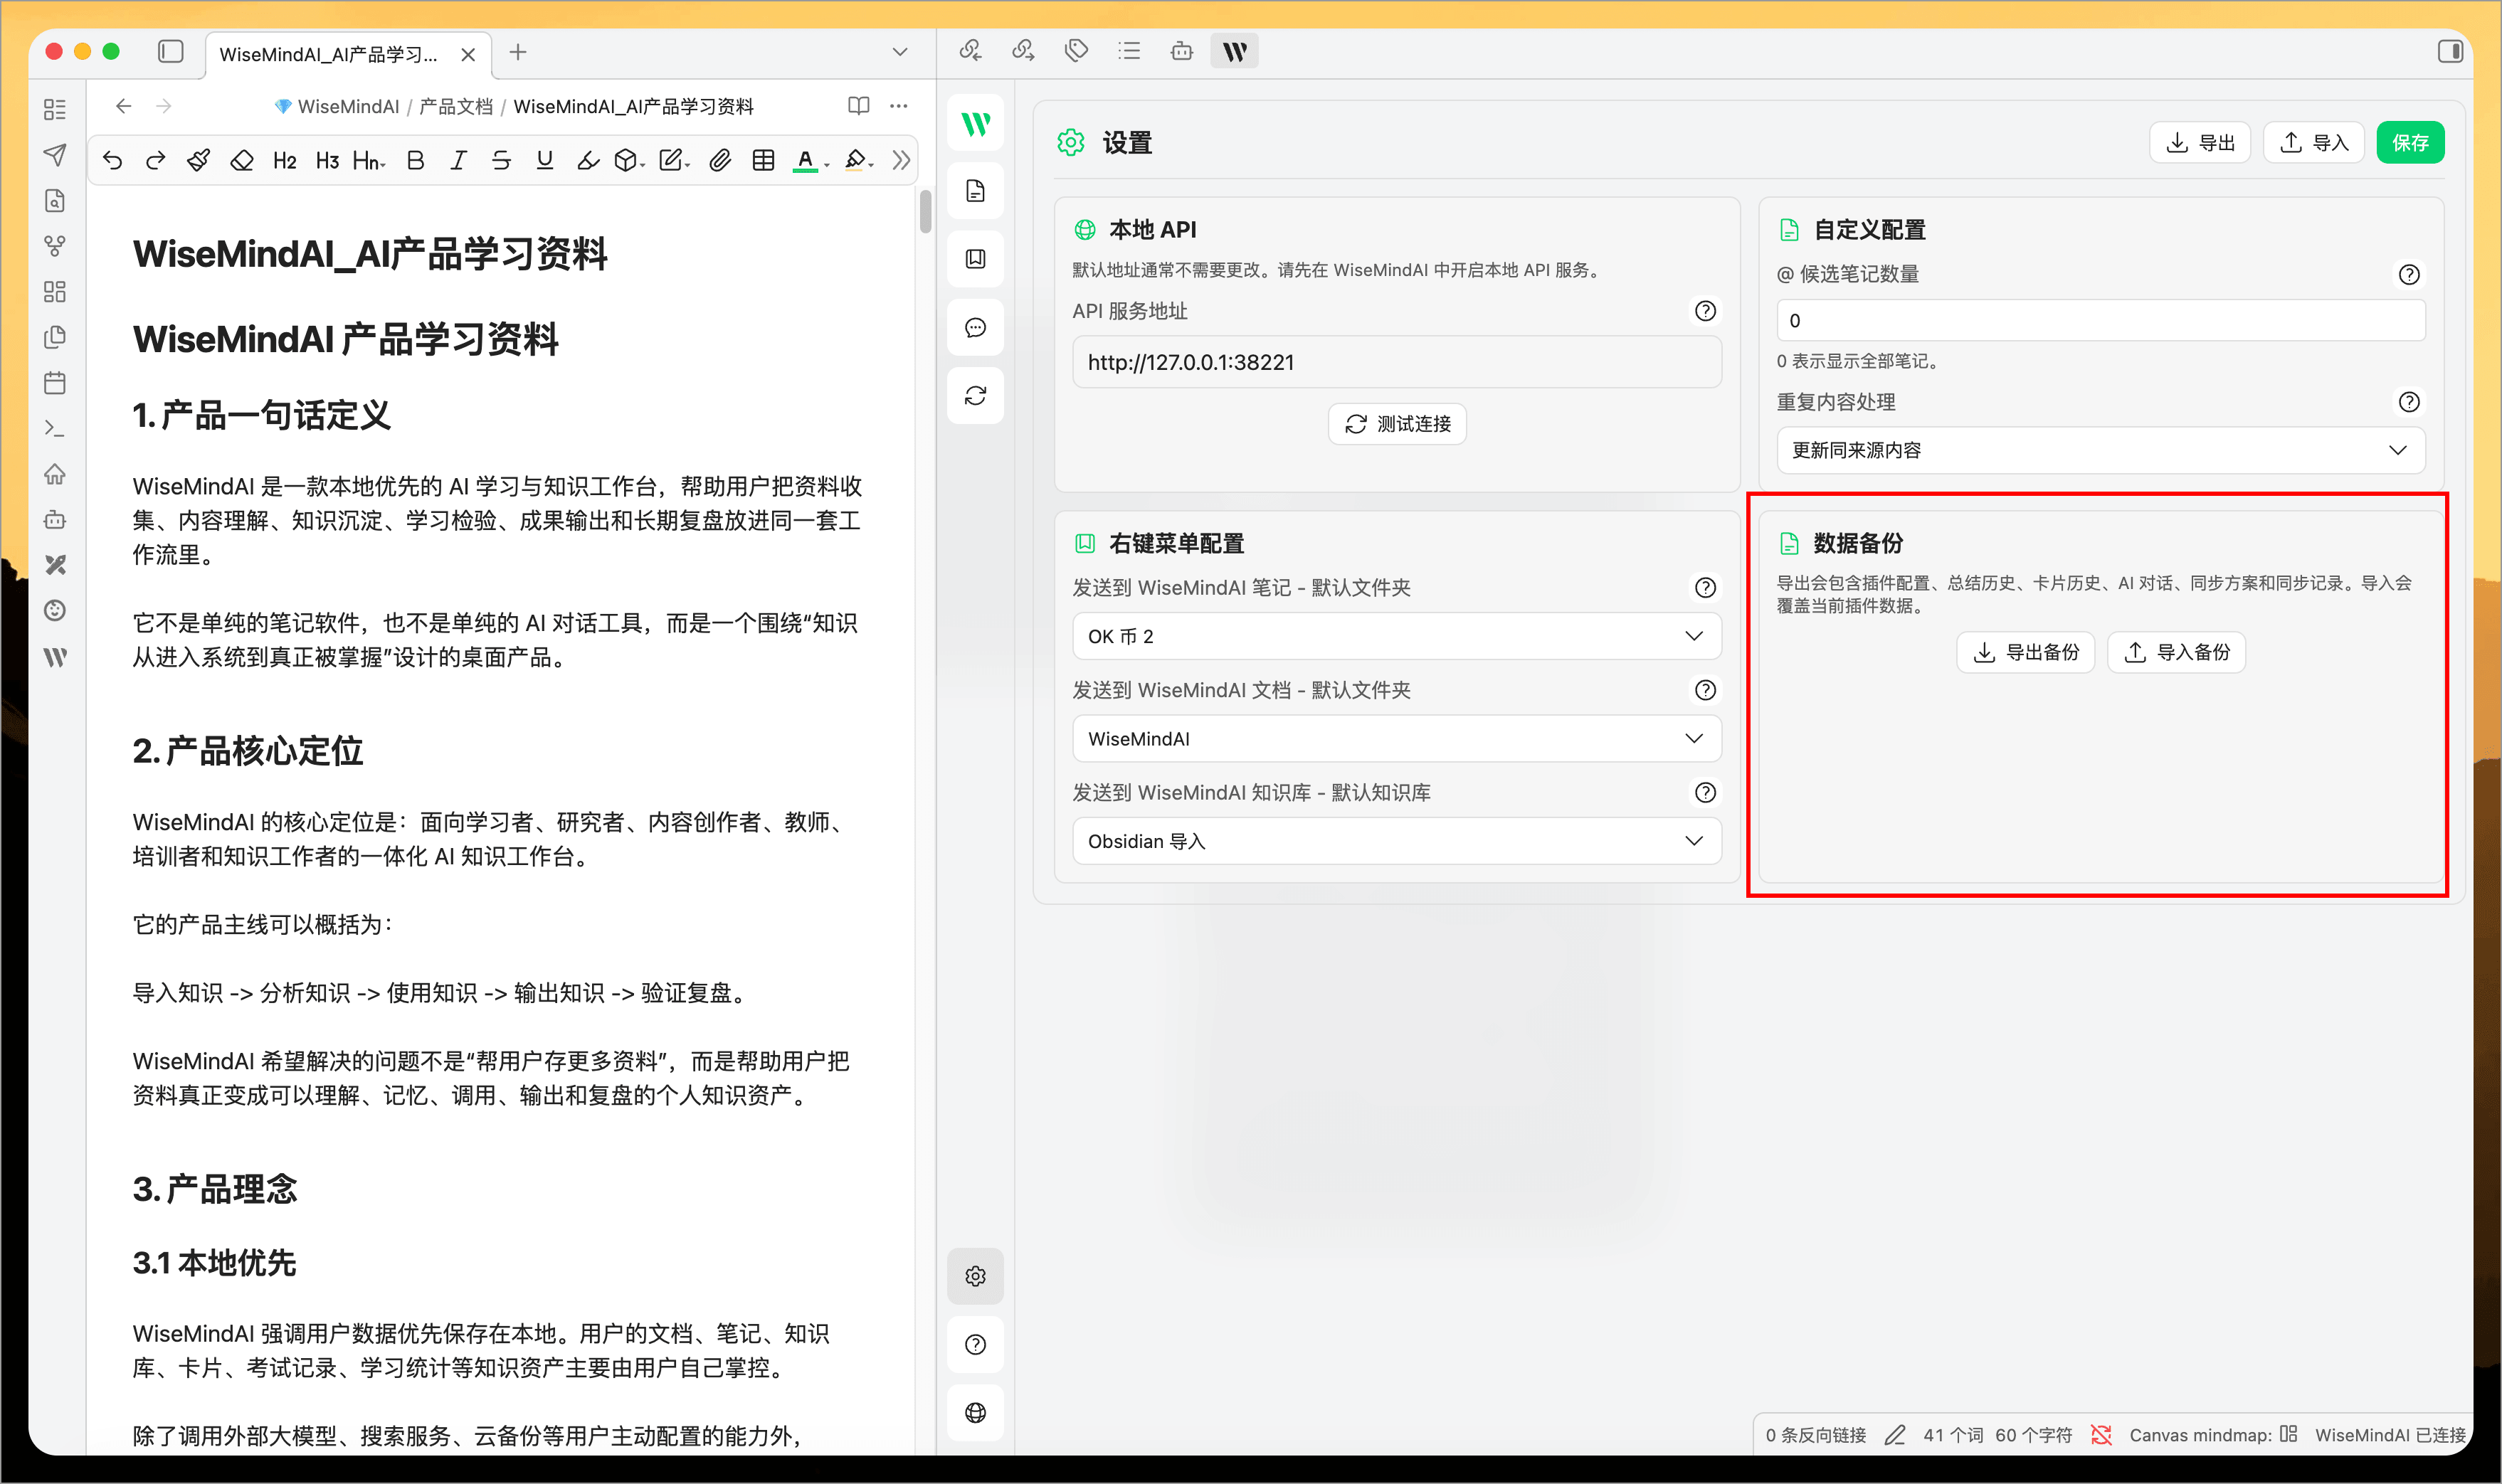
Import and export history
The plugin keeps recent summaries, knowledge cards, and sync runs so you can review past output.
You can import and export all records, which helps when switching devices or upgrading the app.
Common workflows
Summarize the current note
- Open the Markdown note you want in Obsidian.
- Open the WiseMindAI panel and go to Summarize.
- Choose Current note and generate.
- Copy, insert into the current note, or save to WiseMindAI as needed.
Generate cards from a note
- Go to the Cards page.
- Choose the source: current note, selection, or multiple notes.
- Set count, difficulty, and card type.
- Pick the card deck and folder in WiseMindAI.
- Generate, review, then save to WiseMindAI.
Ask questions about a note
- Open a note.
- Go to the Chat page.
- Type your question and send.
- To reference other notes, type
@and pick from the list.
Sync Obsidian and WiseMindAI
- Go to the Sync page.
- Choose direction:
Obsidian -> WiseMindAIorWiseMindAI -> Obsidian. - Select the content to sync.
- Choose where to save or which folder to write to.
- Run sync.
Privacy
The plugin talks to WiseMindAI’s local API on your machine (usually 127.0.0.1). It does not read the WiseMindAI database directly and does not upload your Obsidian notes to third-party servers.
Summaries, cards, and chat use the AI models you configure in WiseMindAI. Whether traffic goes online depends on whether you use local or cloud models there.
FAQ
Cannot connect to WiseMindAI?
Make sure WiseMindAI is running and the local API is on. If you changed the port, update the API address in the plugin settings.
Why don’t some Obsidian files show up?
The plugin mainly handles Markdown. .obsidian, trash, hidden folders, and very large files are skipped.
What’s the difference between right-click send and Sync?
Right-click is for quick one-off sends of a note, folder, or selection. The Sync page is for batch selection, choosing targets, and reviewing results.
Will the plugin change my original Obsidian files?
Summarize, cards, and chat don’t modify your notes unless you insert content or run a write-back to Obsidian.